Getting started with self-hosted Mockoon Pro
Learn how to deploy Mockoon Pro on your own infrastructure, invite your team, collaborate on mock APIs in real time, and deploy them
In this tutorial, we will learn how to get started with Mockoon Pro, the self-hosted platform that lets your team collaborate on mock APIs in real time, deploy them on your own infrastructure, and work from any browser with the embedded web application. Your mock APIs and data never leave your servers.
Prerequisites
Before starting this tutorial, make sure you have:
- Docker (or another OCI container engine) on the machine that will host Mockoon Pro.
- A Mockoon Pro license key. You can start a 14-day free trial (5 licenses, verified work email required, no credit card) or purchase licenses. Each license can be assigned to either a team member (seat) or a running mock instance.
- The Mockoon desktop application 9.9.0 or later, if you want to use the desktop client. The embedded web application does not require any installation.
💡 This tutorial covers Mockoon Pro, the successor of Mockoon Cloud. If you are an existing Mockoon Cloud customer, you can still follow the legacy Mockoon Cloud tutorial.
1. Deploy the Mockoon Pro container
Mockoon Pro is distributed as a single Docker image (mockoon/pro) with no external database. All its data (users, settings, license, synchronized and deployed mock APIs) is stored in the /data directory, which you must mount on a persistent volume.
ℹ️ During the public beta, the image is published under the beta tag (and exact version tags such as mockoon/pro:9.9.0-beta.4). The latest tag will be available with the general availability release.
Try it locally
To evaluate Mockoon Pro on your machine, run the following command:
Copydocker run -d \
  --name mockoon-pro \
  -p 5020:5020 \
  -e MOCKOON_DOMAIN=localhost \
  -e MOCKOON_SERVER_ID=mockoon-pro-local \
  -v mockoon-data:/data \
  mockoon/pro:beta
Mockoon Pro is now available on http://localhost:5020. Your mock APIs will be deployed on subdomains of localhost (e.g. http://mock-abcd1234.localhost:5020), which modern browsers resolve to your machine automatically.
Deploy it for your team
For a real deployment, your team needs to reach Mockoon Pro through HTTPS on a domain you control. Mock APIs are served on subdomains of that domain, so you need:
- A base domain pointing to your server (e.g.
mockoon.company.com). - A wildcard DNS record pointing to the same server (e.g.
*.mockoon.company.com). - A wildcard TLS certificate covering both
mockoon.company.comand*.mockoon.company.com.
The simplest setup is Docker Compose with a Caddy reverse proxy terminating TLS in front of Mockoon Pro. Create a docker-compose.yml file:
Copyservices:
  caddy:
    image: caddy:2-alpine
    restart: unless-stopped
    ports:
      - '80:80'
      - '443:443'
    volumes:
      - ./Caddyfile:/etc/caddy/Caddyfile:ro
      - ./certs:/certs:ro
      - caddy_data:/data
      - caddy_config:/config
    depends_on:
      - mockoon-pro

  mockoon-pro:
    image: mockoon/pro:beta
    restart: unless-stopped
    environment:
      - NODE_ENV=production
      - PORT=5020
      - MOCKOON_DOMAIN=mockoon.company.com
      - MOCKOON_SERVER_ID=mockoon-pro-prod
      - MOCKOON_STORAGE_DIR=/data/
      - USE_HTTPS=true
    volumes:
      - mockoon-pro-data:/data

volumes:
  caddy_data:
  caddy_config:
  mockoon-pro-data:
Then create a Caddyfile next to it, pointing to your certificate files (replace mockoon.company.com with your own domain):
Copyhttps://mockoon.company.com, https://*.mockoon.company.com {
  tls /certs/fullchain.pem /certs/privkey.pem
  reverse_proxy mockoon-pro:5020
}
Start the stack with docker compose up -d. Caddy automatically forwards the WebSocket connections used by the real-time synchronization and by your mock APIs.
💡 Other options (Nginx, on-demand TLS certificates, Kubernetes, OpenShift, direct TLS) and all the environment variables are described in the installation guide.
2. Complete the setup wizard
The first time you open Mockoon Pro in your browser (https://mockoon.company.com, or http://localhost:5020 locally), you are automatically redirected to the setup wizard.
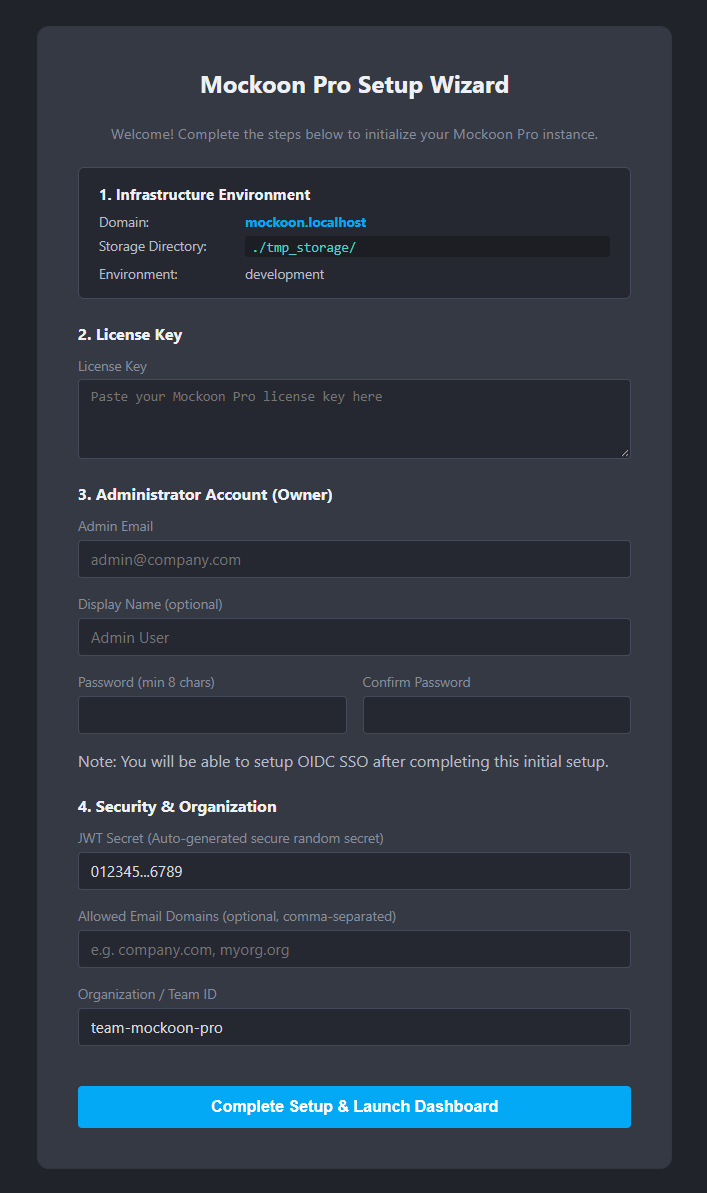
Fill in the form to:
- Paste your license key.
- Create the administrator account (the team Owner) with your email, an optional display name, and a password of at least 8 characters.
- Optionally restrict access to your company email domains and customize your organization identifier.
Once submitted, you are logged in as the Owner and redirected to the dashboard. You can read more in the initial setup documentation.
3. Discover the dashboard
The dashboard gives you an overview of your instance: the number of synchronized environments, running mock instances, registered and connected users, and the list of deployed mock APIs with their URLs.
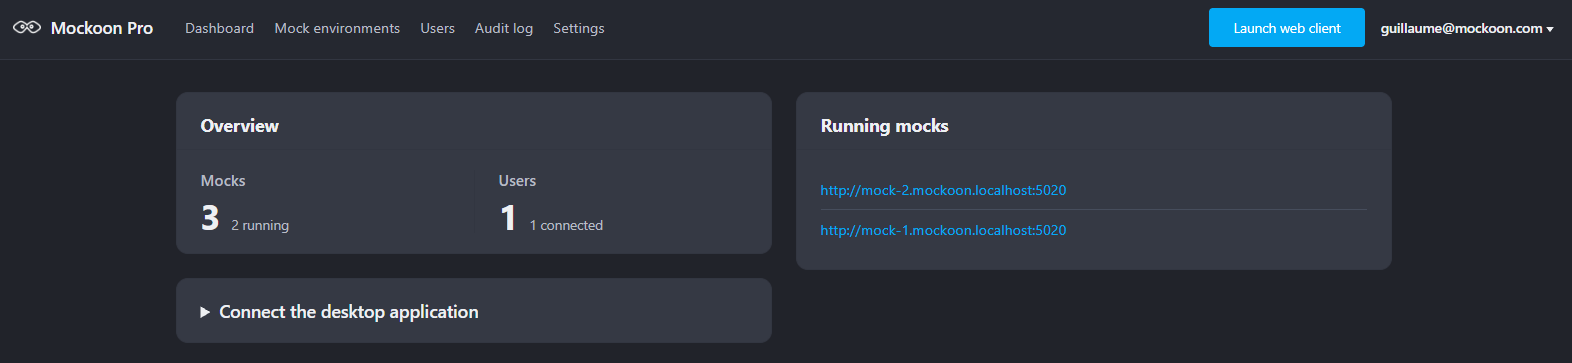
From the navigation bar, you can also open the Users, Audit and Settings pages, and launch the embedded web application.
In the Settings page, you can review your license and decide how its licenses are allocated between users (seats) and mock instances. For example, with a 10-license key, you can assign 6 seats to your team and 4 deployed mock APIs, and adjust this ratio later as your needs evolve. Learn more in the administration documentation.
4. Invite your team members
Mockoon Pro does not allow public sign-ups. Team members join through single-use invitation links.
To invite a member, head to the Users page, enter their email address, select a role (User or Owner) and click Generate Invite Link.
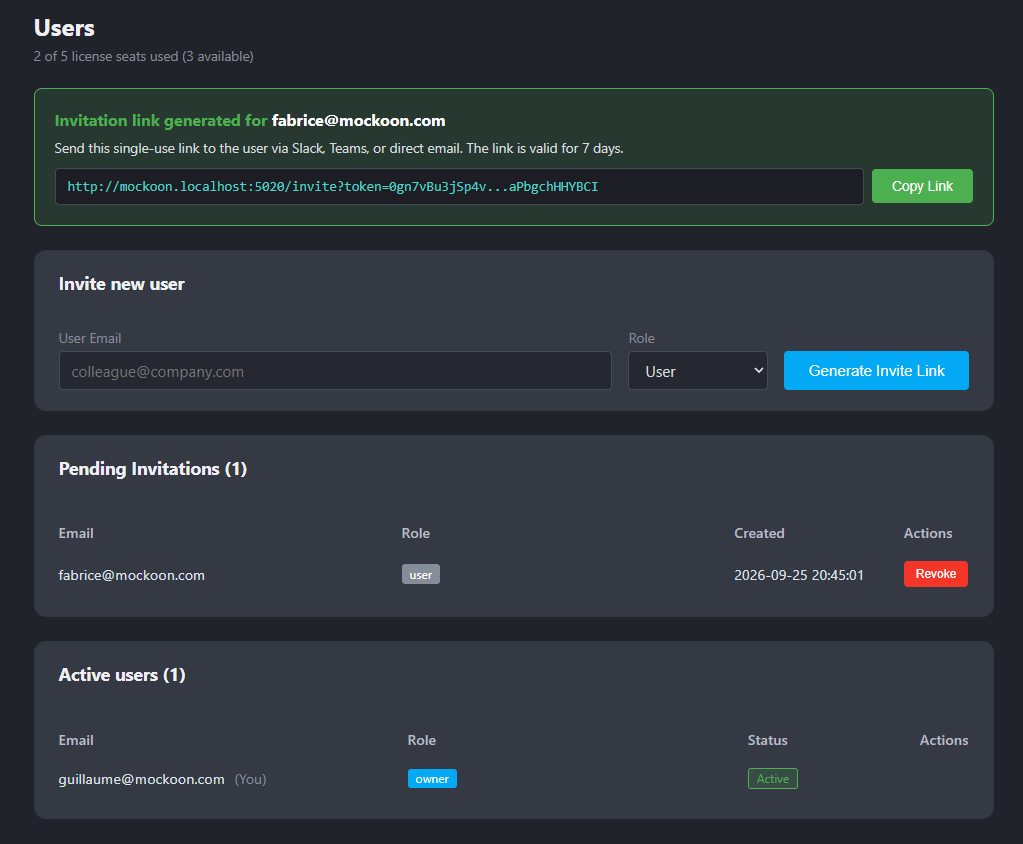
Copy the generated link and share it with your colleague. The link is valid for 7 days. When they open it, they choose a password and are directly added to your team. From this page you can also review pending invitations, disable or remove users, and keep an eye on the seats you have left.
If your company uses an identity provider (Microsoft Entra ID, Okta, Keycloak, etc.), you can instead switch to OpenID Connect single sign-on in the Settings page. Read the authentication documentation to learn how to set it up and how to restrict access to your company email domains.
5. Connect to your instance
Your team can use Mockoon Pro in two ways.
Embedded web application
Mockoon Pro bundles the web application, served at /app on your domain (e.g. https://mockoon.company.com/app). Click Launch web client in the dashboard navigation bar to open it already signed in and configured for your instance.
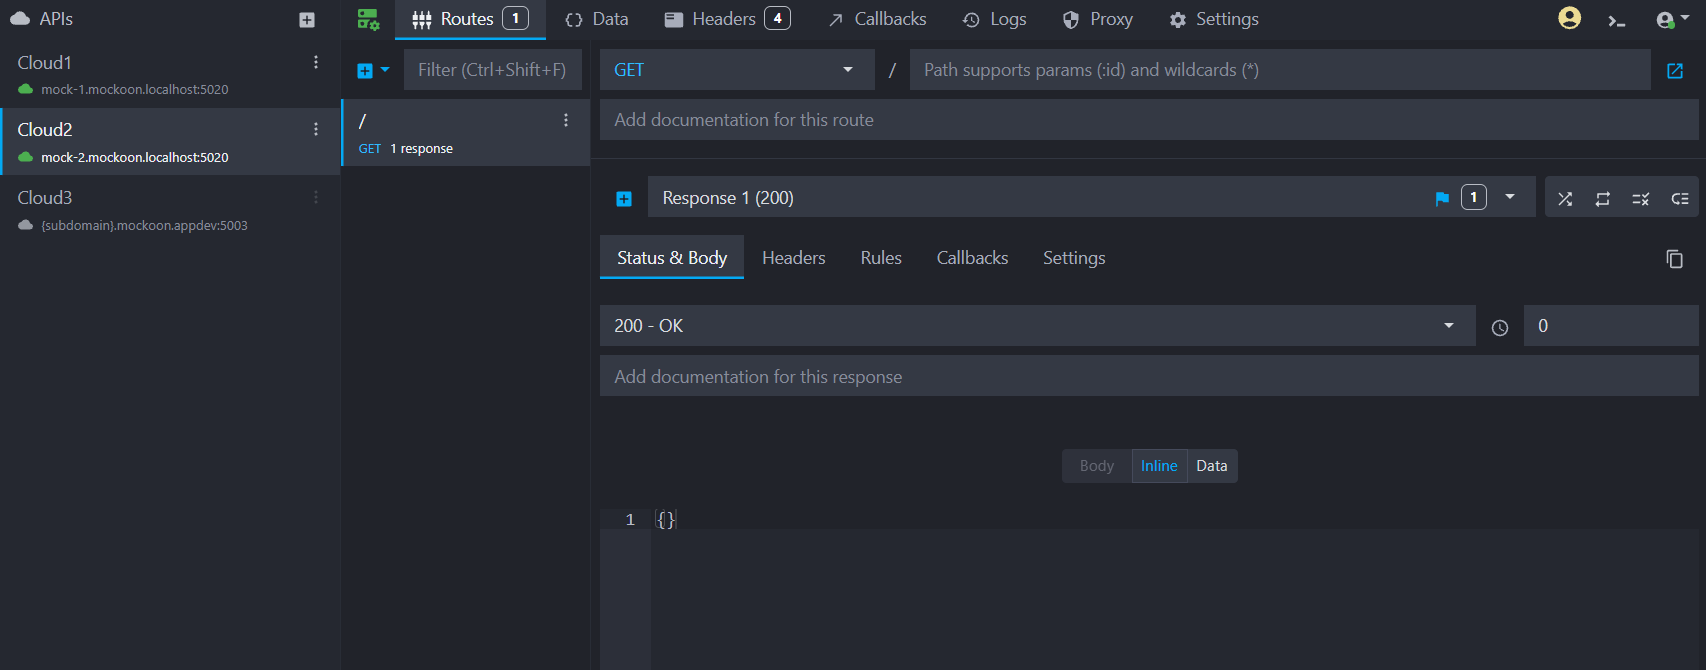
No installation is needed, which makes it perfect for team members who cannot install the desktop application, such as QA or product teams.
Desktop application
To use the desktop application (version 9.9.0 or later):
- Open the application settings.
- Set the self-hosted instance URL to your domain (e.g.
https://mockoon.company.com). - Close the settings and click Log in in the avatar menu to authenticate in your browser.
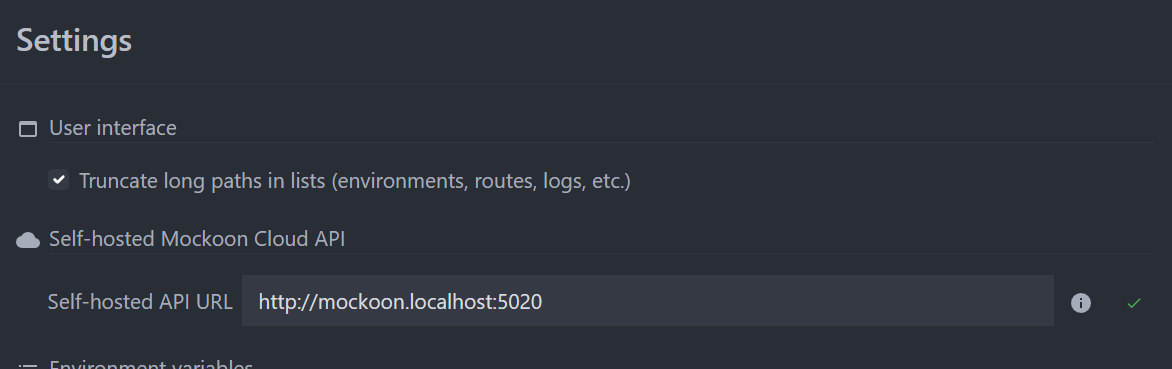
More details are available in the desktop application and web application documentation.
6. Collaborate on your mock APIs in real time
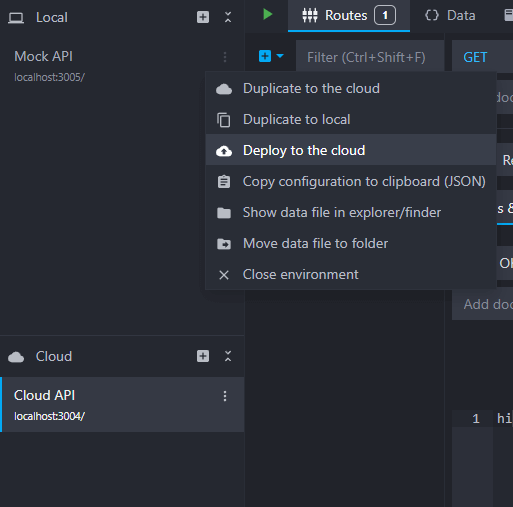
Once connected, you can create cloud environments, which are stored on your Mockoon Pro server and synchronized between all your team members. To create one, use the "New cloud environment" entry of the cloud environments menu, or "Duplicate to the cloud" on an existing local environment.
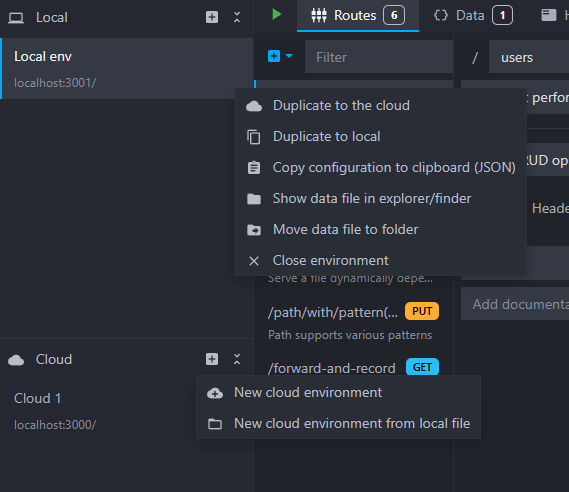
Cloud environments are automatically synchronized as soon as they are created or updated, and several people can edit the same environment at the same time. Presence indicators show who is connected and who is editing which environment.
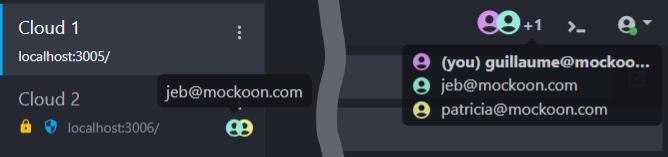
Local environments stay on your machine and are not synchronized, so you can still keep personal experiments private. Learn more about conflict handling and offline behavior in the data synchronization documentation.
7. Deploy your mock APIs
You can now deploy your mock APIs to your Mockoon Pro instance to make them available to your team, your applications, and your CI. Open the environment context menu and click "Deploy to the cloud".
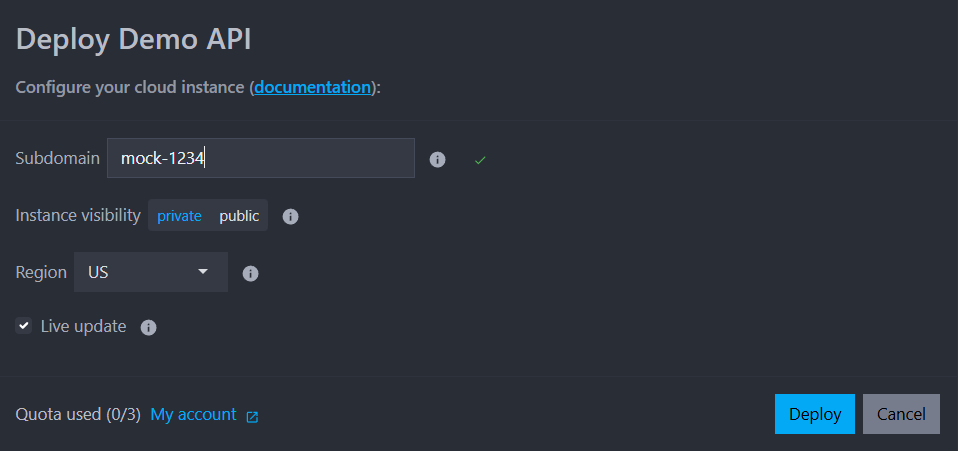
In the deployment dialog, you can customize the subdomain, the visibility, and the live updates:
- Public: anyone with the URL can call your mock API.
- Private: callers must also send the instance API key in the
Authorizationheader. - Live updates: your changes are pushed to the running instance automatically, without re-deploying.
Your mock API is then available on a unique URL in the form of https://mock-abcd1234.mockoon.company.com, served by your own infrastructure. You can find the URL and the API key in the management dialog, where you can also re-deploy or delete the instance.
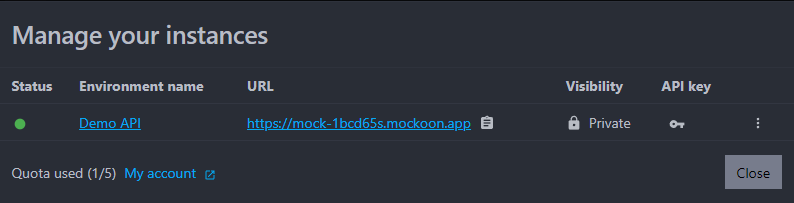
💡 Each running mock instance uses one of your licenses. If you reach the limit, you can reallocate licenses between users and instances in the Settings page.
To learn more about deployments, the supported features and limitations, please read the documentation.
Going further
- Review administrative, security and workspace activity with the audit trail.
- Back up the
/datavolume regularly, and follow the update procedure when a new version is released. - Need help with your deployment, or interested in a managed cloud? Contact us.
You might also be interested in these tutorials
Advanced data bucket manipulation with setData
Learn how to build stateful mock APIs with Mockoon's setData helper using advanced API key rotation, usage tracking, login, and lockout scenarios.
Read moreSimulate webhooks and callbacks in your mock API server
Learn how to simulate webhooks or callbacks in your mock API server to test your application's behavior when receiving asynchronous events from third-party services or APIs.
Read moreGetting started with Mockoon Cloud
Learn how to get started with Mockoon Cloud, a cloud-based service that allows you collaborate on your mock APIs with your team
Read more