Create your first mock API with Mockoon
Learn how to create your first mock REST API with Mockoon in less than 5 minutes
Mockoon is a free cross-platform desktop application that takes API mocking to the next level. Mockoon offers a fast and easy-to-use interface and gives you complete control over your mock APIs with advanced functionality like a templating system, a proxy mode, and request recording.
This tutorial will show you how to install the desktop application and configure your first mock API.

📘 To learn more about APIs and API mocking in general, head over to our API guide or API mocking guide
Step 1. Install the application
Mockoon desktop binaries are available for the three major operating systems in various formats. It is also available in several stores like Windows Store or Ubuntu Snap. Visit the download section on the homepage to download the binary or installer for your operating system:
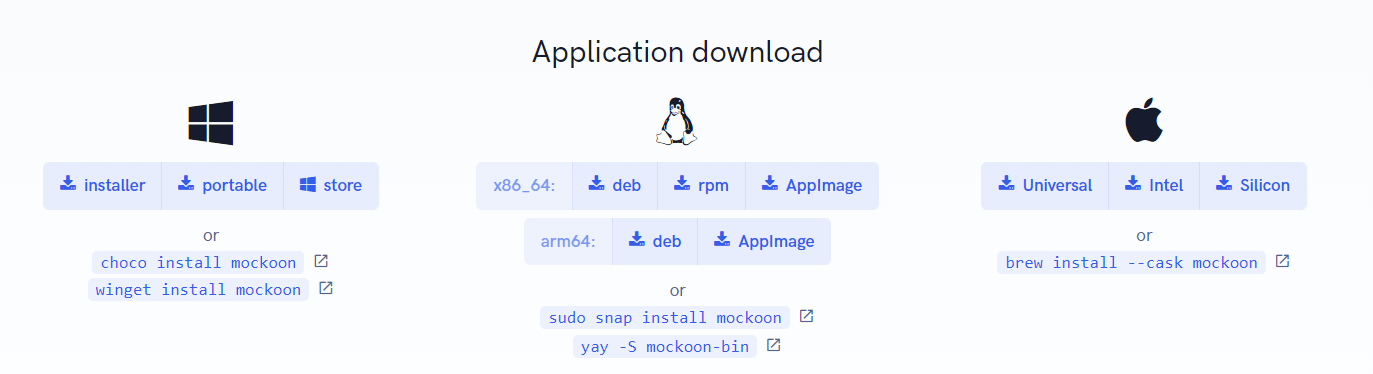
Depending on the operating system, you will have to install the application by following the standard installation process, like double-clicking on the installer or dragging the application to the Applications folder. After the installation is complete, you can launch the application.
Step 2. Create your first mock API
After launching the application for the first time, you will have the opportunity to take a quick tour of the interface. You can skip this step if you are already familiar with the application or want to explore it by yourself. You can also access the tour later by clicking on the "Help" menu and selecting "Take the tour".
At the first launch, you will have a default setup, the demo API, also called an environment in Mockoon. This demo API showcases the main features of Mockoon and is a good starting point to understand how Mockoon works.
You can keep this demo environment and build from here or create a new empty one, which we will do in this tutorial.
To create a new mock API, click on the "New environment" button. You will be prompted to save the environment's data file on your computer:

💡 You can synchronize your setup in our cloud and collaborate with your coworkers by subscribing to Mockoon Cloud
Step 3. Create your first API endpoint
The newly created mock API, or environment, already includes an endpoint with no path and a GET method. This endpoint will be available at http://localhost:3000/ by default. You can modify it by setting up the method and path of your choice.
You can also create a new endpoint by selecting "Http route" in the route menu add button. In this tutorial, we will create a new GET endpoint with the path /users, which will return a list of randomly generated users:
Step 4. Body and headers configuration
We will customize the endpoint by adding a response body that will return a JSON of randomly generated users. You can copy and paste the following JSON in the response body field. This template uses our templating system to generate random data for each user:
Copy// Sample body
[
  {{#repeat 10}}
    {
      "id": "{{faker 'string.uuid'}}",
      "name": "{{faker 'person.firstName'}} {{faker 'person.lastName'}}",
      "email": "{{faker 'internet.email'}}",
      "phone": "{{faker 'phone.number'}}",
      "address": "{{faker 'location.streetAddress'}}, {{faker 'location.city'}}, {{faker 'location.state' abbreviated=true}} {{faker 'location.zipCode'}}",
      "birthdate": "{{faker 'date.past'}}",
      "isActive": {{faker 'datatype.boolean'}}
    }
  {{/repeat}}
]
We will also add a Content-Type header to the response. This header is necessary for the client to understand the response format. In this case, we will set it to application/json:
💡 You can create a more complex configurations by adding multiple responses triggered by rules.
Step 5. Add a delay to the response
The last step is to add a delay to the response to simulate a real-world scenario where the server takes some time to process the request. This is useful for testing the client's behavior when the server is slow to respond.
You can add a delay to the response by setting the delay field in the response configuration. In this case, we will set it to 2000 milliseconds (2 seconds):

Step 6. Run and call your mock API
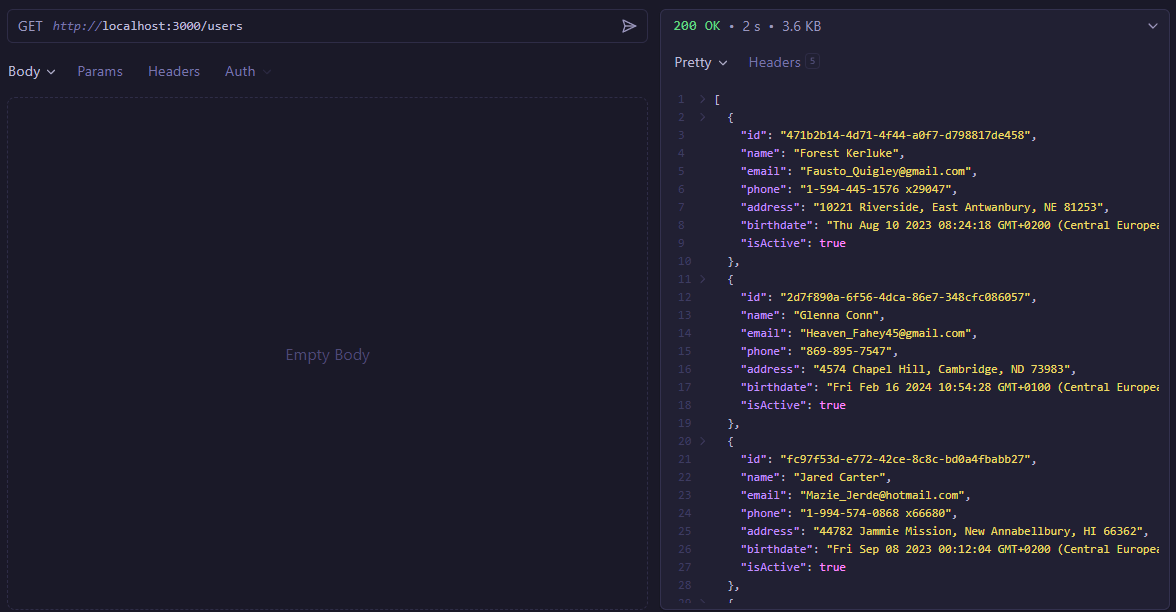
Finally, you can run your mock API by clicking on the green "play" arrow in the header. This will start the server and make it available on http://localhost:3000.
You can do a test call to the following URL http://localhost:3000/users using a tool like curl, Postman, or your browser. You should see the list of randomly generated users in the response:
Step 7. Learn more
Now that you know how to create a basic mock API, you can head over to the official documentation to explore the other functionalities available like requests logging, partial API mocking with proxy mode, or the templating system.
You might also be interested in these tutorials
Create your first mock API with Mockoon
Learn how to create your first mock REST API with Mockoon in less than 5 minutes
Read moreUse persisting data buckets to share data across routes
Learn how to use Mockoon's data bucket feature to share data across routes and create more advanced scenarios with configuration endpoints
Read moreRecord API requests and HTTP traffic and auto-mock endpoints
Learn how to record entering API requests and HTTP traffic and auto-mock your endpoints with Mockoon
Read more