Advanced data bucket manipulation with setData
Learn how to build stateful mock APIs with Mockoon's setData helper using advanced API key rotation, usage tracking, login, and lockout scenarios.
Data buckets are often introduced as shared, persistent JSON stores for your routes. But they become much more powerful when you start updating them at runtime.
With the setData helper, you can turn a static mock API into a stateful system that reacts to previous requests: rotate API keys, count usage, track failed logins, create sessions, or lock accounts.
In this tutorial, we will focus on advanced data bucket manipulation with setData and build two realistic scenarios:
- an API key management flow with rotation and usage tracking
- a login flow with failed attempts, session creation, and account locking
📘 If you are new to data buckets, start with our persisting data buckets tutorial first.
Why use setData?
The setData helper updates a data bucket while a request is being processed. This allows you to store state between calls and simulate systems that evolve over time.
It supports the following operations:
Copy
In practice:
- use
setfor replacing a single scalar or object - use
mergefor partial updates to an existing object - use
pushfor logs, sessions, or append-only lists - use
delto remove temporary values - use
incanddecfor counters, quotas, and retry tracking - use
invertto toggle flags such asenabled,locked, ormaintenanceMode
Where should you call setData?
You can use setData anywhere templating is supported, but the most common place is directly in a route response body.
Because setData returns an empty string, you can place one or more calls at the top of a response body template and then return the JSON payload you want your client to receive.
Like all data bucket changes, the new state persists until you restart the mock server.
Use case 1: API key rotation and usage tracking
This first example simulates an API gateway that can rotate keys, update metadata, disable access, and count authorized calls.
Create the data bucket
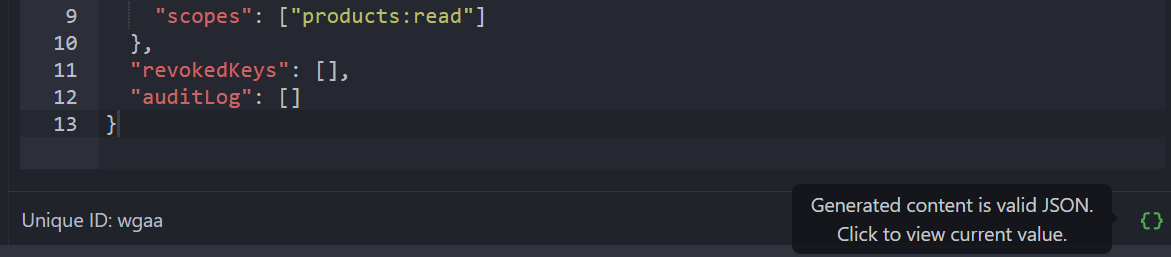
Create a data bucket named apiState with the following content:
Copy{
  "currentKey": "sk_test_initial",
  "lastGeneratedKey": null,
  "enabled": true,
  "usageCount": 0,
  "revokedKeys": [],
  "auditLog": []
}
This bucket will hold the currently active key, some metadata, and an audit trail of administrative actions.
Rotate the active API key
Create a route like POST /admin/api-key/rotate and use the following body:
Copy{ "message": "API key rotated" }
This single route performs several mutations in sequence:
- it generates a new key and stores it in
lastGeneratedKey. - archives the previous key in
revokedKeys. - makes the new key the
currentKey. - resets the usage counter
usageCountto zero. - appends an event to the audit log.
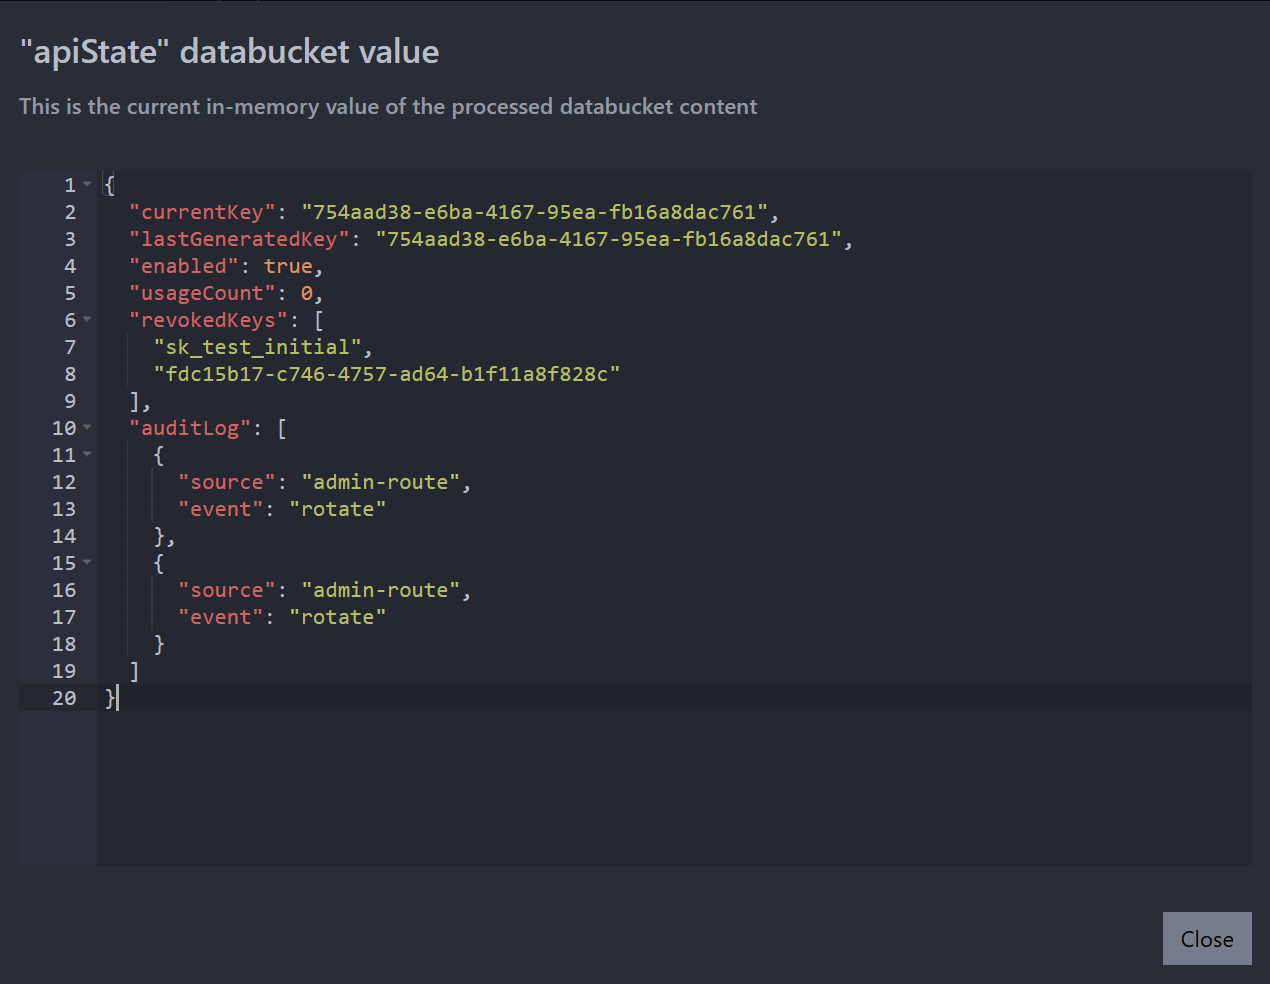
After calling the route with curl -X POST http://localhost:3000/admin/api-key/rotate, you can check the live state of the bucket by clicking on the "Click to view current value" button below the data bucket editor:
You should see the updated data:
Count each authorized request
Now create a protected route like GET /private/products with two responses: a default 401 Unauthorized for missing or invalid keys, and a 200 that increments the counter when the correct key is provided.
📘 If you are new to responses and rules, check out our multiple responses tutorial first.
Default response — 401 Unauthorized
Set the first (default, with a blue flag) response to status code 401 with the following body:
Copy{
  "error": "Missing or invalid API key"
}
This response will be sent whenever no other rule matches, i.e. when the caller did not supply the right key.
Second response — 200 with a rule
Add a second response with status code 200. In the Rules tab, add a rule to check that the X-Api-Key request header matches the current key stored in the bucket:
- Source:
Header - Path:
X-Api-Key - Operator:
Equals - Value:
{{data 'apiState' 'currentKey'}}
The value uses a custom templating rule: the data helper reads currentKey from the bucket at request time and compares it to the incoming header. This means the rule automatically validates against the most recent key, even after a rotation.
Set the response body to:
Copy[ { "id": 1, "name": "Keyboard" }, { "id": 2, "name": "Mouse" } ]
The setData calls run before the response is returned, so the counter is already incremented by the time the client receives the product list.
After calling this route with the correct key curl -H "X-Api-Key: <currentKey>" http://localhost:3000/private/products, you can check the bucket state again to see the updated usageCount and new entry in the auditLog.
Use case 2: Stateful login in 3 steps
This second example is a short, dependent workflow: each step changes the bucket state used by the next step.
Create the data bucket
Create a data bucket named loginState with the following content:
Copy{
  "users": {
    "demoUser": {
      "email": "[email protected]",
      "password": "pa55word",
      "token": null,
      "failedAttempts": 0,
      "lastLoginAt": null
    }
  },
  "loginEvents": []
}
Step 1. Validate credentials with response rules
Create a route like POST /auth/login with two responses:
- default response:
401 Unauthorized(invalid credentials) - second response:
200 OK(credentials are valid)
Use this body for the default 401 response to keep track of failed attempts:
Copy{ "message": "Invalid credentials" }
Ensure the blue flag is on this response to make it the default one.
For the 200 response, add a rule that checks the request body password against the real password stored in the bucket:
- Source:
Body - Path:
password - Operator:
Equals - Value:
{{data 'loginState' 'users.demoUser.password'}}
You can add the following body to the 200 response to generate a token and log a successful login:
Copy{ "message": "Login successful", "token": "" }
Now call the endpoint with a wrong password:
Copy$ curl -X POST http://localhost:3000/auth/login -H 'Content-Type: application/json' -d '{"password":"wrong"}'
Expected response:
Copy{ "message": "Invalid credentials" }
At this point, users.demoUser.failedAttempts should be 1.
Then call with the correct password from your bucket (pa55word in this example):
Copy$ curl -X POST http://localhost:3000/auth/login -H 'Content-Type: application/json' -d '{"password":"pa55word"}'
Expected result: the 200 response is selected by the rule, and a fresh token is generated, stored in users.demoUser.token, and returned in the response.
Step 2. Use the session token to access a protected endpoint
Create a route like GET /auth/me with two responses:
- default response:
401 Unauthorized - second response:
200 OKwith a rule checkingAuthorizationheader
For the default 401 response, use this body:
Copy{
  "error": "Unauthorized"
}
For the 200 response, add this rule:
- Source:
Header - Path:
Authorization - Operator:
Equals - Value:
Bearer {{data 'loginState' 'users.demoUser.token'}}
Use this response body for the 200 response:
Copy{
  "email": "{{data 'loginState' 'users.demoUser.email'}}",
  "lastLoginAt": "{{dataRaw 'loginState' 'users.demoUser.lastLoginAt'}}"
}
Now call the endpoint with the token returned by step 1:
Copy$ curl http://localhost:3000/auth/me -H "Authorization: Bearer <token-from-step-1>"
Expected 200 response includes the lastLoginAt stored during step 1. If the token is missing or wrong, the default 401 response is returned.
Tips for advanced stateful scenarios
When building larger stateful mocks with setData, keep these rules in mind:
- Keep each bucket focused on one domain such as
apiState,loginState, orbillingState. - Use
mergewhen you want partial updates andsetwhen you want to fully replace a value. - Reserve
pushfor logs, histories, and append-only collections. - Remove temporary values with
delas soon as they are no longer needed. - Restart the mock server when you want to reset every bucket to its original content.
Go further
Once you are comfortable with setData, you can combine it with other Mockoon features to create even richer simulations:
- validate request bodies against a JSON schema to ensure only well-formed data triggers mutations.
- simulate webhooks and callbacks by using
setDatato store callback URLs and trigger them with dynamic data.
Download the example environment
You can download the example environment file created for this tutorial or directly open it in Mockoon desktop or CLI:
You might also be interested in these tutorials
Getting started with Mockoon Cloud
Learn how to get started with Mockoon Cloud, a cloud-based service that allows you collaborate on your mock APIs with your team
Read moreSelf-host your mock APIs with Mockoon CLI
Learn how to create mock REST APIs and self-host them in all headless and server environments with Mockoon CLI
Read moreCreate a partial mock API with Mockoon's proxy mode
Learn how to create partial mocks of existing APIs with Mockoon's proxy mode in three easy steps
Read more