
Create full mock REST APIs in seconds using Mockoon's CRUD routes
Learn how to use Mockoon's CRUD routes to create a full mock REST API and manipulate resources with GET, POST, PUT, PATCH, and DELETE requests.
Where Mockoon routes are independent and stateless, CRUD routes can generate multiple endpoints to perform CRUD operations (Create, Read, Update, Delete) on data buckets. Let's see how to create a full REST API in seconds using Mockoon's CRUD routes.
1. Create a new CRUD route
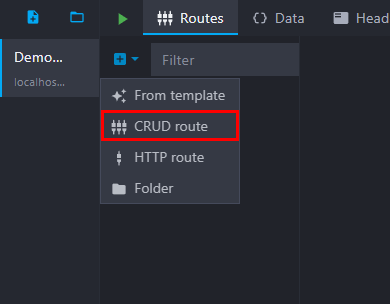
The first step is to create a new automated CRUD route. To create a CRUD route, click on the "CRUD route" entry in the add route menu:
Then, set its path, usually a resource name:

2. Create and link a data bucket to the CRUD route
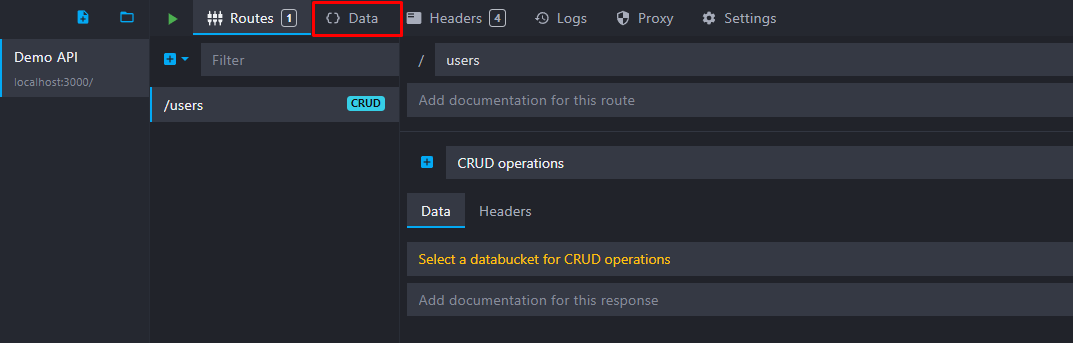
You may have noticed that the CRUD route is not linked to a data bucket yet, hence the "Select a data bucket for CRUD operations" message in the route response:

A data bucket is a key-value store where you can define some string content that you can reuse in multiple route responses.
They are stored at the environment level and generated when the server starts or sometimes after the first call. A data bucket content persists between mock API calls. So, they are the perfect way to create JSON "databases" to be reused in your routes.
📘 To learn more about data buckets, head over to our data buckets documentation or tutorial.
Let's create one and link it to the route.
Create a new data bucket
To create a new data bucket, open the Data options by clicking on the tab at the top of the window:
Add a new data bucket by clicking on the "plus" button and personalize your data bucket name and content on the right part of the screen. Here, we named it "Users" and added some JSON content with templating to generate three fake users at runtime:
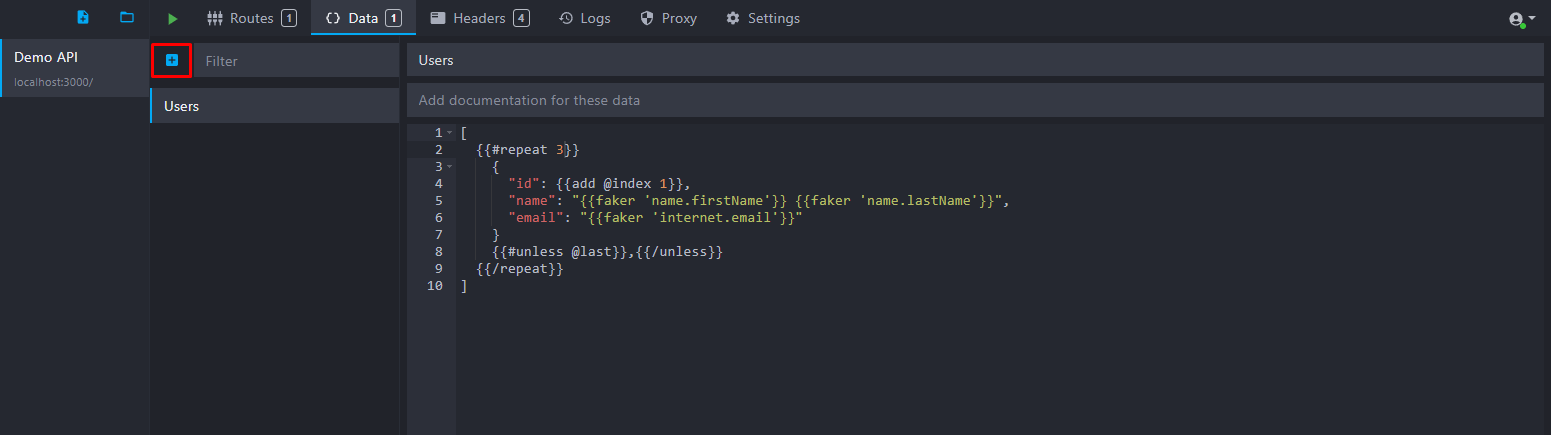
Here is the JSON content we used:
Copy[
  {{#repeat 3}}
    {
      "id": {{add @index 1}},
      "name": "{{faker 'person.firstName'}} {{faker 'person.lastName'}}",
      "email": "{{faker 'internet.email'}}"
    }
    {{#unless @last}},{{/unless}}
  {{/repeat}}
]
Link the data bucket to the CRUD route
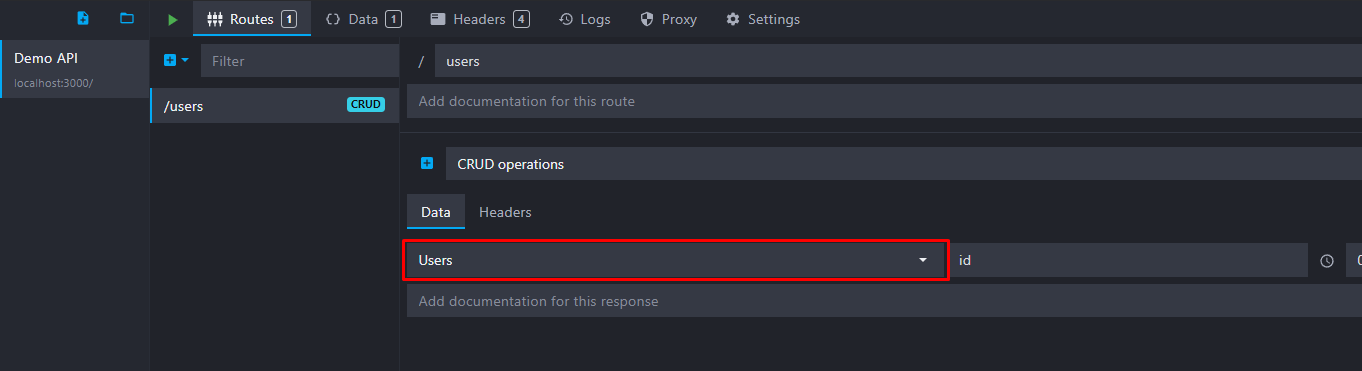
You can now link the data bucket to the CRUD route we created previously. To link the data bucket, select your data bucket in the dropdown:
3. Perform CRUD operations
Now that the data bucket is linked to the CRUD route, you can perform CRUD operations on it.
When starting the mock API, Mockoon will automatically generate a series of routes for each CRUD operation on the data bucket. Some examples:
GET /usersto list all users of our bucket.GET /users/:idto get the user with a specific ID.POST /usersto add a new user to the data bucket array.PUT /users/:idto update the user with a specific ID.DELETE /users/:idto delete the user with a specific ID.
📘 More routes are created by CRUD endpoints, and many options are available: sorting, pagination, etc. Head over to our CRUD routes documentation for more information.
List all users
To list all users, you can perform a GET request on the /users route using your favorite tool (Postman, Insomnia, curl, etc.):
Copy$ curl http://localhost:3000/users
Copy[
  { "id": 1, "name": "Gudrun Rempel", "email": "[email protected]" },
  { "id": 2, "name": "Roberta Conroy", "email": "[email protected]" },
  { "id": 3, "name": "Tia Armstrong", "email": "[email protected]" }
]
Get a single user
To get the first user, you can perform a GET request on the /users/1 route:
Copy$ curl http://localhost:3000/users/1
Copy{
  "id": 1,
  "name": "Gudrun Rempel",
  "email": "[email protected]"
}
Add a new user
To add a new user with id 4, you can perform a POST request on the /users route with the following payload:
Copy$ curl -X POST http://localhost:3000/users -H 'Content-Type: application/json' -d '{"id": 4, "name": "John Doe", "email": "[email protected]"}'
Copy{ "id": 4, "name": "John Doe", "email": "[email protected]" }
Replace a user
To Replace the first user, you can perform a PUT request on the /users/1 route with the following payload:
Copy$ curl -X PUT http://localhost:3000/users/1 -H 'Content-Type: application/json' -d '{"id": 1, "name": "Mock Oon", "email": "[email protected]"}'
Copy{ "id": 1, "name": "Mock Oon" }
Delete a user
To delete the second user, you can perform a DELETE request on the /users/2 route:
Copy$ curl -X DELETE http://localhost:3000/users/2
List all users again
Finally, you can list the users again to see all the changes we made:
Copy$ curl http://localhost:3000/users
Copy[
  { "id": 1, "name": "Mock Oon", "email": "[email protected]" },
  { "id": 3, "name": "Tia Armstrong", "email": "[email protected]" },
  { "id": 4, "name": "John Doe", "email": "[email protected]" }
]
Sorting, pagination, and filtering
On the main GET /users route, you can use query parameters to sort, paginate, and filter the list of users. Here are some examples:
- Sort users by name:
GET /users?sort=name&order=asc. - Paginate users (get the second set of 5 users):
GET /users?limit=5&page=2. - Filter users by name:
GET /users?name_like=john. This will return all users with a name containing "john". - Perform a full-text search on any property of the users list:
GET /users?search=john. This will return all users with a name or email (or any other property) containing "john".
📘 Have a look at our complete filtering documentation.
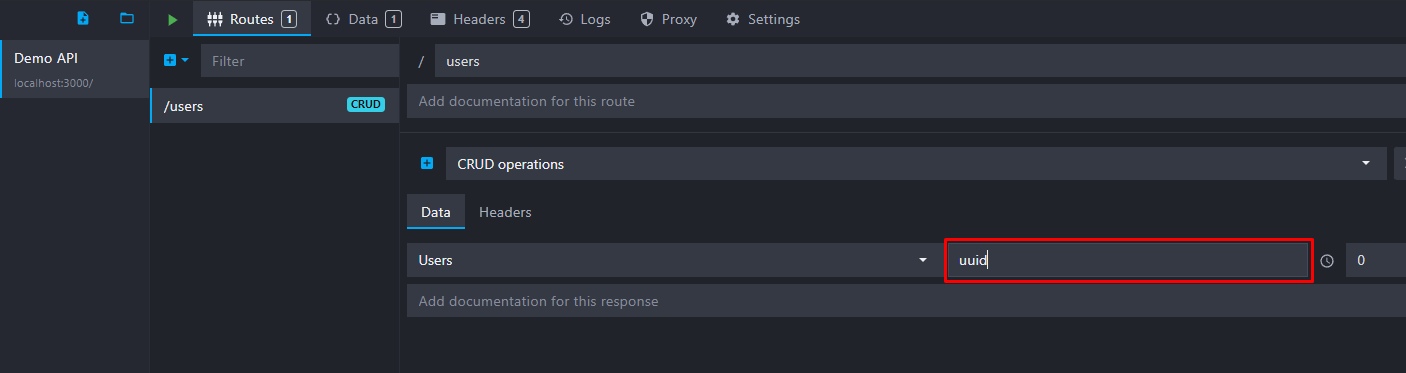
Customizing the "id" property
By default, CRUD endpoints will use the id property to identify objects in an array in all the routes manipulating a single resource (e.g. GET /resource/:id). However, you can change this property to anything you want, like uuid, custom_id, etc:
Data persistence
As you can see, the data bucket content is generated once when the server starts, and its state persists between calls. You can reset the bucket to its initial state by restarting your mock API.
⚠️ The data bucket generated content is not persisted on disk to make testing multiple scenarios easier.
Manipulating data buckets content programmatically
You can also manipulate data buckets programmatically using the setData templating helper. This helper allows you to update the content of a data bucket, push a new value to an array, delete a property, increment or decrement a number, or invert a boolean. It can be used anywhere templating helpers are supported and is a good complement to CRUD routes to create complex scenarios.
Copy
You might also be interested in these tutorials
Advanced data bucket manipulation with setData
Learn how to build stateful mock APIs with Mockoon's setData helper using advanced API key rotation, usage tracking, login, and lockout scenarios.
Read moreAccess environment variables in your templates
Learn how to access environment variables in your mock server templates to avoid exposing your API keys.
Read moreCreate global rules for your routes
Learn how to create global rules to protect all your routes at once.
Read more