Call a mock API from your Ionic mobile application
Learn how to call a REST API from your Ionic mobile application and mock it using Mockoon API mocking tools
In this guide, we will learn how to call an API endpoint from an Ionic mobile application using the Angular framework. If you already have an existing API that you want to use, you can skip the first step, in which we create a fake REST API endpoint using Mockoon.
1. Create a mock API endpoint with Mockoon
During the development of your Ionic mobile application, you may need to mock an API that is not ready yet, or only partially available (see partial mocking with the proxy mode). For this, the easiest way is to create a mock API using a tool like Mockoon. (Read more about the benefits of API mocking).
To learn more about how to set up your first mock API with Mockoon, head over to the Getting started tutorial.
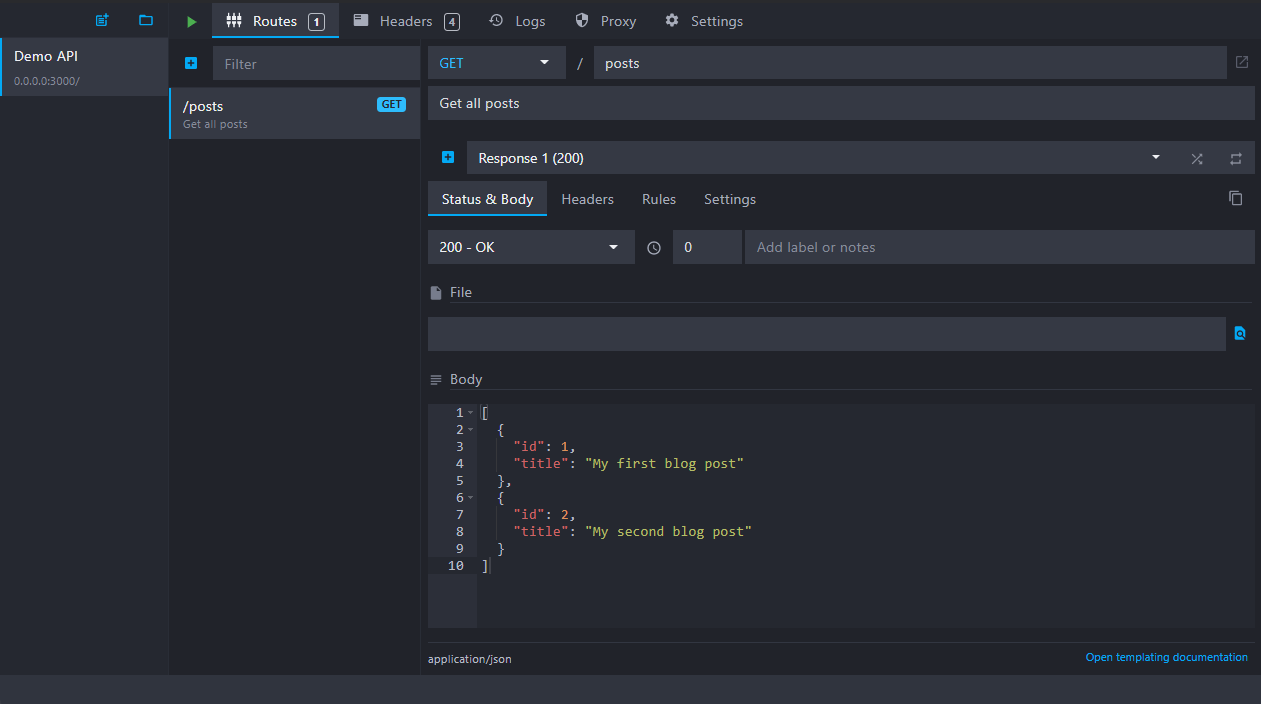
For the rest of the tutorial, we will use an array of fake blog posts. In Mockoon, create a GET /posts API endpoint that returns an array of blog posts:

You can use the following JSON as the body returned by the endpoint:
Copy[
  {
    "id": 1,
    "title": "My first blog post"
  },
  {
    "id": 2,
    "title": "My second blog post"
  }
]
Note that your fake mock server will be available at the following URL: http://localhost:3000. This is the URL we will need to use in our Angular service.
2. Make a call to the API endpoint in your Angular service
After creating a mock API endpoint in Mockoon, you can now call it from your Ionic mobile application using an Angular service. To do so, we need to create a new "posts" service using Ionic's following command:
Copy$ ionic g service services/posts
> ng.cmd generate service services/posts --project=app
CREATE src/app/services/posts.service.spec.ts (352 bytes)
CREATE src/app/services/posts.service.ts (134 bytes)
[OK] Generated service!
Then we will need to inject and use Angular's HttpClient in our new service to be able to call our API:
Copyimport { Injectable } from '@angular/core';
import { HttpClient } from '@angular/common/http';

@Injectable()
export class PostsService {
  constructor(private http: HttpClient) {}
}
We finally add a getPosts method that we will call from our component and returns an Observable containing our list of posts:
CopygetPosts(): Observable<{ id: number; title: string }[]> {
  return this.http.get('http://localhost:3000/posts');
}
Below is our service after putting all the pieces of code together:
Copyimport { Injectable } from '@angular/core';
import { HttpClient } from '@angular/common/http';

@Injectable()
export class PostsService {
  constructor(private http: HttpClient) {}

  getPosts(): Observable<{ id: number; title: string }[]> {
    return this.http.get('http://localhost:3000/posts');
  }
}
3. Subscribe to the Observable in your component
Let's display our blog post titles in our "HomePage" component. We first need to inject our PostsService and then assign our Observable returned by the getPosts method so we can use it in the template:
Copyimport { Component, OnInit } from '@angular/core';
import { Observable } from 'rxjs';
import { PostsService } from '../services/posts.service';

@Component({
  selector: 'app-home',
  templateUrl: 'home.page.html',
  styleUrls: ['home.page.scss']
})
export class HomePage implements OnInit {
  public posts$: Observable<{ id: number; title: string }[]>;
  constructor(private postsService: PostsService) {}

  ngOnInit() {
    // assign the Observable returned by the `getPosts` method
    this.posts$ = this.postsService.getPosts();
  }
}
4. Display the titles as a list of items
We can now display our list of post titles using ion_item elements. We will reuse the div#container from the home.page.html file created by the ionic start command. We will use a simple *ngFor directive combined with the | async pipe to subscribe to our observable:
Copy<ion-header [translucent]="true">
  <ion-toolbar>
    <ion-title> Blank </ion-title>
  </ion-toolbar>
</ion-header>

<ion-content [fullscreen]="true">
  <ion-header collapse="condense">
    <ion-toolbar>
      <ion-title size="large">Blank</ion-title>
    </ion-toolbar>
  </ion-header>

  <div id="container">
    <ion-item *ngFor="let post of posts$ | async">
      <ion-label> {{post.title}} </ion-label>
    </ion-item>
  </div>
</ion-content>
We can now see the result after running the ionic serve command:

You might also be interested in these tutorials
Self-host your mock APIs with Mockoon CLI
Learn how to create mock REST APIs and self-host them in all headless and server environments with Mockoon CLI
Read moreCreate a partial mock API with Mockoon's proxy mode
Learn how to create partial mocks of existing APIs with Mockoon's proxy mode in three easy steps
Read moreServe static files with a custom mock endpoint
Learn how to create an endpoint to serve static files (images, fonts, etc.) in your mock API server using Mockoon
Read more