Access environment variables in your templates
Learn how to access environment variables in your mock server templates to avoid exposing your API keys.
In this tutorial, we will learn how to access environment variables in your mock server routes using the getEnvVar templating helper. It allows you to avoid exposing your API keys and other sensitive parameters in your mock server configuration and to easily manage your configuration across different environments.
Scope and support
Environment variables are available everywhere templating helpers are supported: response body, rules, etc.
They are available in all your environments, in the desktop application, or when using the CLI or the serverless library.
1. Access environment variables
To access an environment variable in your templates, use the getEnvVar helper. By default, only the environment variables prefixed with MOCKOON_ are available. You can access the variable in your templates using the getEnvVar helper. If you omit the prefix, the helper will automatically add it:
Copy
📘 Head over to the environment variables documentation where you will find more examples.
2. Change the prefix
You can change the prefix or remove it entirely in the desktop application settings:
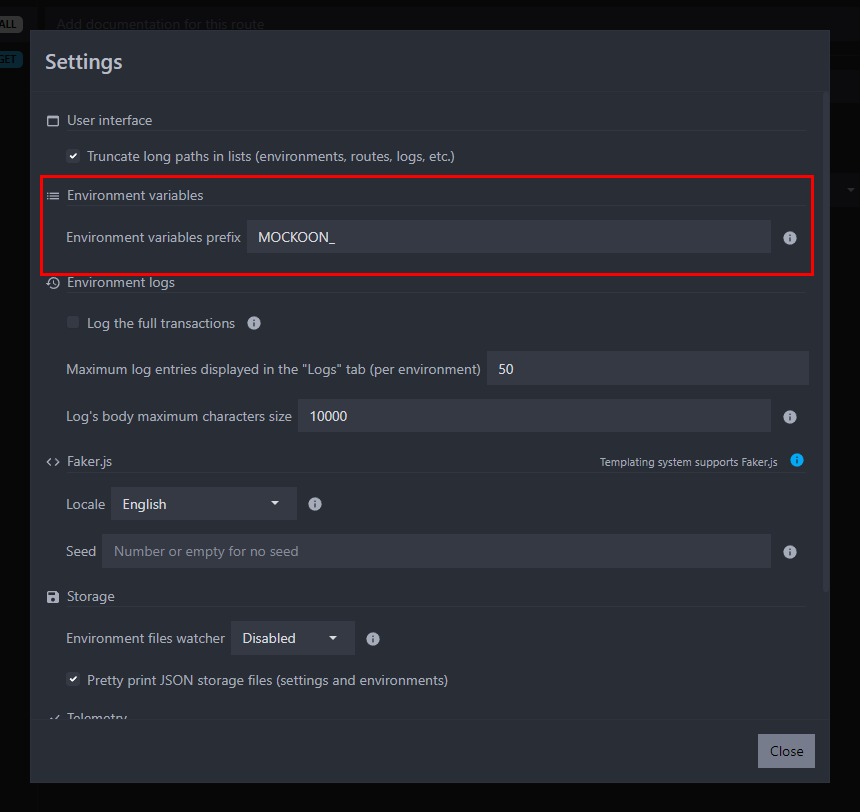
You can also modify the prefix when running your mock with the CLI by using the --env-vars-prefix flag:
Copymockoon-cli start --env-vars-prefix MY_PREFIX_ --data ./mock.json
Finally, the prefix can also be changed when using the serverless library by using the envVarsPrefix option:
Copyconst mockoonServerless = new mockoon.MockoonServerless(mockEnv, {
  envVarsPrefix: 'MY_PREFIX_'
});
⚠️ Removing the prefix will make all the environment variables accessible in your templates and could expose sensitive information.
3. An example use case: authentication token
Let's say you need Mockoon to forward some calls to a third-party API using the proxy mode. This API requires an authentication token, and you don't want to store it in your mock server configuration.
You can store this token in an environment variable and access it in Mockoon using the helper.
Create an environment variable
In your terminal, set the environment variable:
Copyexport MOCKOON_API_TOKEN=abcd1234
💡 Do not forget to restart the application to reflect your operating system variable changes.
Access the environment variable and send it to the third party API
In your mock server, we will enable the proxy mode, point to the correct API endpoint (here, the endpoint is a fictive one), and use the getEnvVar helper to access the token and add it to an Authorization header:
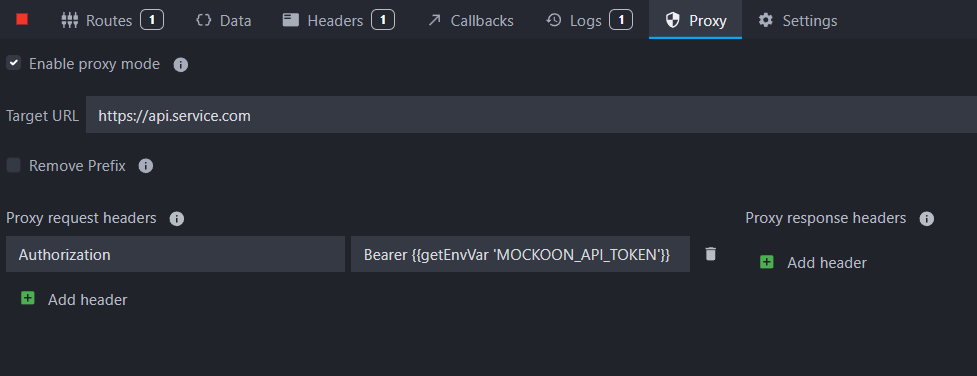
You can see that we are using the getEnvVar helper to access the MOCKOON_API_TOKEN environment variable and add it to the Authorization header:
CopyBearer
Now, when you send a request to a non-existing route, for example, GET http://localhost:3002/users, Mockoon will forward it to the third-party API with the correct Authorization header.
To simulate this, we will point the proxy to another Mockoon instance running on http://localhost:3001 instead of https://api.service.com:
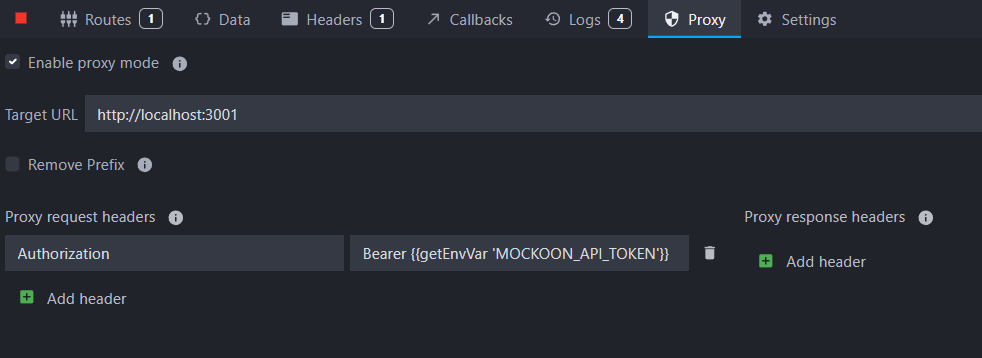
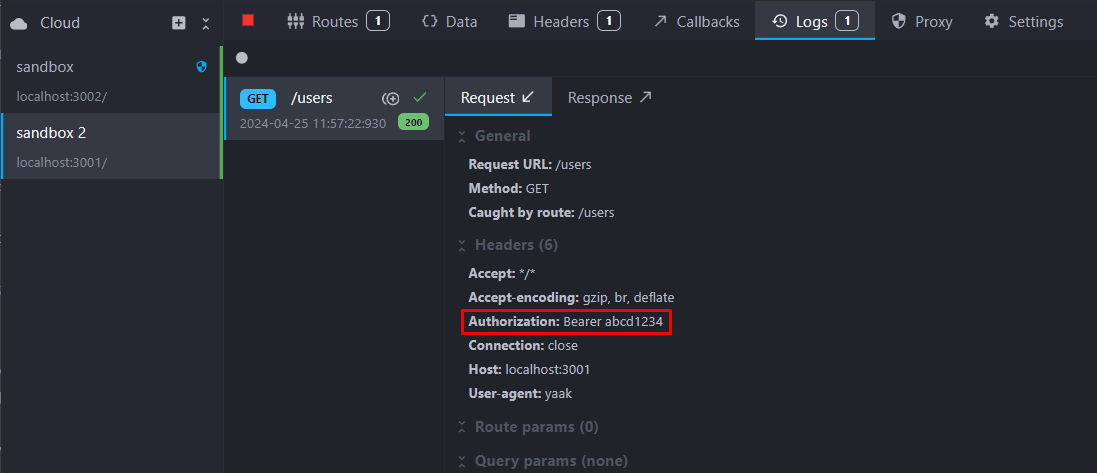
After making a call to our original mock server running on http://localhost:3002, we can inspect the forwarded request in the other instance and verify that the Authorization header is correctly set:
You might also be interested in these tutorials
Create multiple route responses with dynamic rules
Learn how to create multiple responses for an API endpoint and serve them using dynamic rules
Read moreGenerate dynamic mock data with Mockoon templating system
Learn how to generate dynamic JSON, CSV or XML realistic mock data with Mockoon powerful templating system and helpers
Read moreSimulate webhooks and callbacks in your mock API server
Learn how to simulate webhooks or callbacks in your mock API server to test your application's behavior when receiving asynchronous events from third-party services or APIs.
Read more