
Call a mock API from your Next.js application
Learn how to call a REST API from your Next.js application service and mock it using Mockoon API mocking tools
This guide will teach you how to call any REST API from your Next.js application. If you already have an existing API that you want to use, you can skip the first step, in which we create a fake REST API using Mockoon.
1. Create a mock API endpoint with Mockoon
When working on your Next.js application, you may need to mock an API that doesn't exists yet, or is only partially available (see partial mocking with the proxy mode). For this, the easiest way is to create a mock API using a tool like Mockoon. (Read more about the benefits of API mocking).
To learn more about how to set up your first mock API with Mockoon, head over to the Getting started tutorial.
For the rest of the tutorial, we will use an array of fake blog posts. In Mockoon, create a GET /posts API endpoint that returns an array of blog posts:
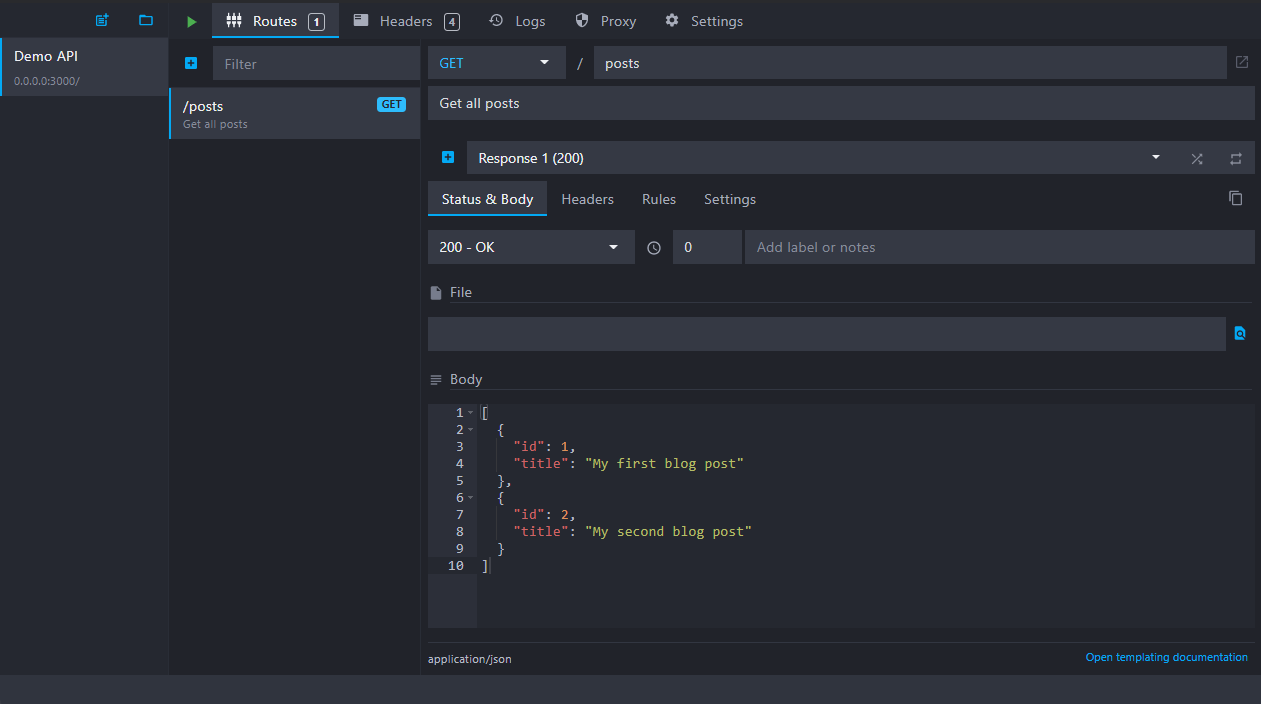
You can use the following JSON as the body returned by the endpoint:
Copy[
  {
    "id": 1,
    "title": "My first blog post"
  },
  {
    "id": 2,
    "title": "My second blog post"
  }
]
Note that your fake mock server will be available at the following URL: http://localhost:3000. This is the URL we will need to use in our Next.js page.
2. Make a call to the API endpoint in your Next.js page
After creating a mock REST API endpoint in Mockoon, you can now call it from your Next.js page.
To do so, we need to use either the getStaticProps or the getServerSideProps functions. You can read more about these functions in the official documentation.
Using the getStaticProps function will allow you to pre-render the page at build time using the props returned by getStaticProps:
Copyexport async function getStaticProps(context) {
  // We will fetch the blog posts here

  return {
    props: {} // props will be passed to the page
  };
}
To fetch our blog posts from the mock API, we can use the fetch function and add the resulting data in the returned props:
Copyexport async function getStaticProps(context) {
  // fetch the blog posts from the mock API
  const res = await fetch('http://localhost:3000/posts');
  const posts = await res.json();

  return {
    props: { posts } // props will be passed to the page
  };
}
3. Use the posts prop in your page
We can now render our blog posts on the page as <li> using a simple map loop:
Copyfunction HomePage({ posts }) {
  return (
    <ul>
      {posts.map((post) => (
        <li>{post.title}</li>
      ))}
    </ul>
  );
}
Use Next.js's environment variables
To avoid modifying the server URL directly in the Next.js page's code, you can put this URL in Next.js's environment variables.
To do so, create an environment variable in your .env.local or .env.development file:
Copy# .env.local file
API_URL=http://localhost:3000
You can then use the environment variable exposed by Next.js through the process.env object in the getStaticProps function:
Copyexport async function getStaticProps(context) {
  // fetch the blog posts from the mock API using the environment variable
  const res = await fetch(`${process.env.API_URL}/posts`);
  const posts = await res.json();

  return {
    props: { posts } // props will be passed to the page
  };
}
You might also be interested in these tutorials
Generate dynamic mock data with Mockoon templating system
Learn how to generate dynamic JSON, CSV or XML realistic mock data with Mockoon powerful templating system and helpers
Read moreUse persisting data buckets to share data across routes
Learn how to use Mockoon's data bucket feature to share data across routes and create more advanced scenarios with configuration endpoints
Read moreUse global variables to save the state between requests
Use global variables to save the state between requests and simulate complex workflows and scenarios in your mock API.
Read more