
Call a mock API from your JavaScript application
Learn how to call a REST API endpoint from your JavaScript application and mock it using Mockoon API mocking tools
This short tutorial will teach you how to call any REST API endpoint from your JavaScript application. If you already have an existing API that you want to use, you can skip the first step, in which we create a fake REST API using Mockoon.
1. Create a mock API endpoint with Mockoon
When working on your JavaScript application, you may need to mock an API that doesn't exists yet, or is only partially available (see partial mocking with the proxy mode). For this, the easiest way is to create a mock API using a tool like Mockoon. (Read more about the benefits of API mocking).
To learn more about how to set up your first mock REST API with Mockoon, head over to the Getting started tutorial.
For the rest of the tutorial, we will use an array of imaginary blog posts. In Mockoon, create a GET /posts API endpoint that returns an array of simple blog posts with an id and a title:
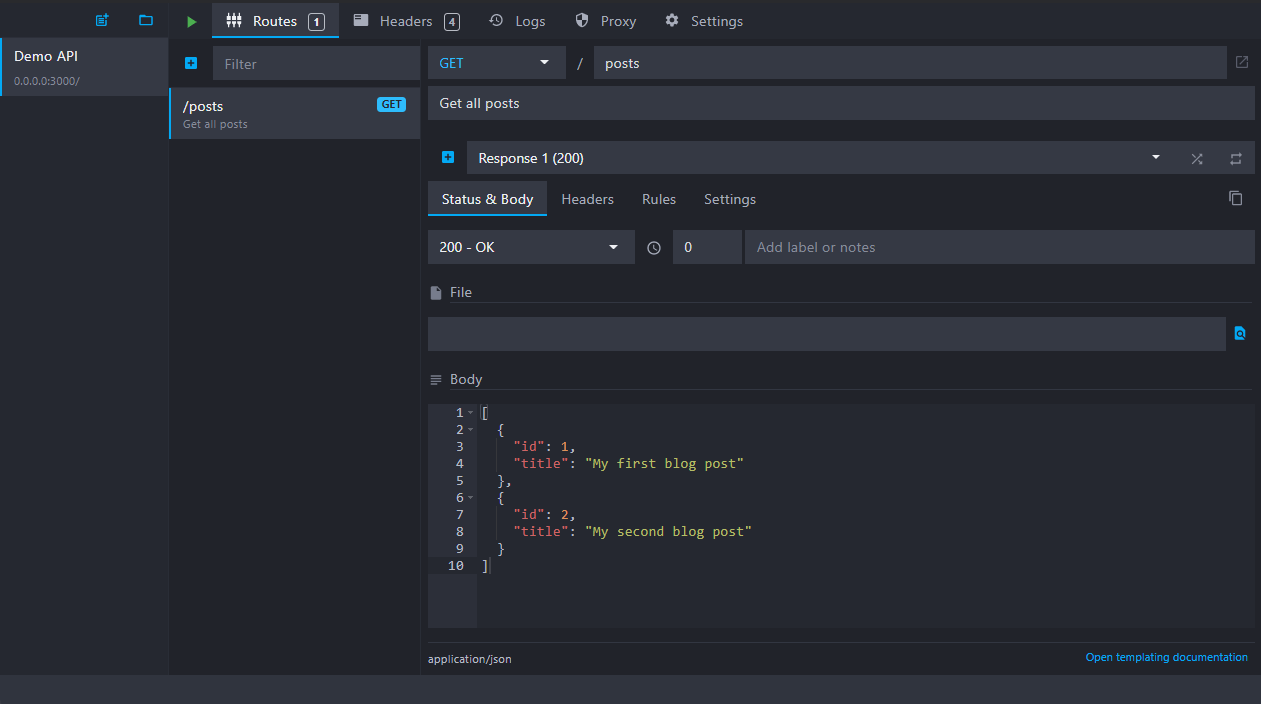
You can use the following JSON as the body returned by the endpoint:
Copy[
  {
    "id": 1,
    "title": "My first blog post"
  },
  {
    "id": 2,
    "title": "My second blog post"
  }
]
Note that your fake mock server will be available at the following URL: http://localhost:3000. This is the URL we will need to use in our JavaScript code.
2. Make a call to the API endpoint in your JavaScript
After creating a mock REST API endpoint in Mockoon, you can now call it from your Javascript app.
Let's first create a minimal HTML file to execute our JavaScript:
Copy<!DOCTYPE html>
<html lang="en">
  <head>
    <meta charset="UTF-8" />
    <meta name="viewport" content="width=device-width, initial-scale=1.0" />
    <title>My page</title>
  </head>
  <body>
    <ul id="posts"></ul>

    <script>
      // Our JavaScript will go here
    </script>
  </body>
</html>
It contains a script tag to add our JavaScript and a ul element that will receive our list of posts later.
We can save this HTML code in an index.html file.
The next step is to add JavaScript in the script tag to call our GET /posts API endpoint. For this, we will use the fetch function:
Copy<script>
  fetch('http://localhost:3000/posts')
    .then((response) => response.json())
    .then((posts) => console.log(posts));
</script>
By default, fetch will make a GET call on the provided endpoint. As we receive JSON data, we first need to convert it as a JavaScript object before using it, with response.json().
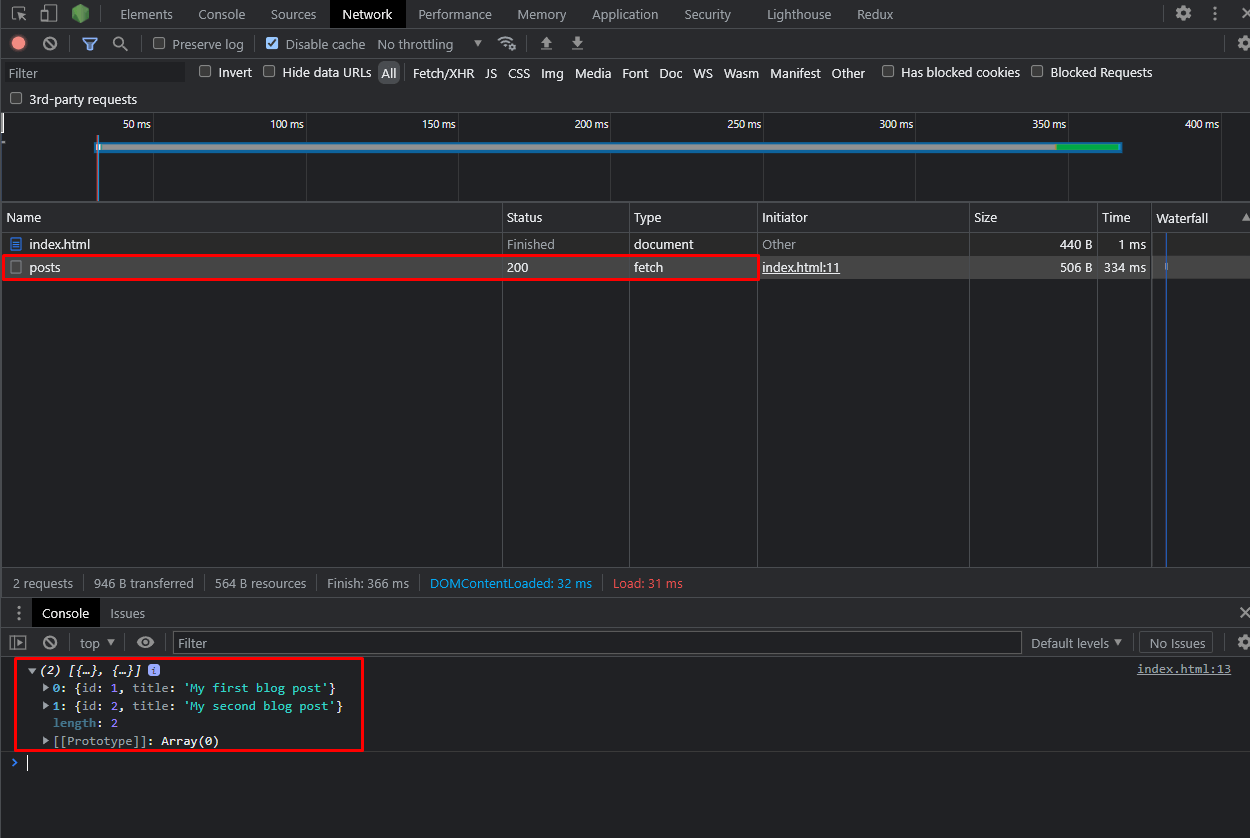
After opening your index.html file in your browser, you should see a call in the network tab and your data displayed in the console:
3. Use the posts in your HTML
We can now render the list of post titles on the page as <li> using a simple forEach loop:
Copy<script>
  fetch('http://localhost:3000/posts')
    .then((response) => response.json())
    .then((posts) => {
      const postsContainer = document.getElementById('posts');

      posts.forEach((post) => {
        const li = document.createElement('li');
        li.textContent = post.title;
        postsContainer.appendChild(li);
      });
    });
</script>
For each post, we will create a new li element and append it to the ul container element that we created earlier.
Here is all the code put together:
Copy<!DOCTYPE html>
<html lang="en">
  <head>
    <meta charset="UTF-8" />
    <meta name="viewport" content="width=device-width, initial-scale=1.0" />
    <title>My page</title>
  </head>
  <body>
    <ul id="posts"></ul>
    <script>
      fetch('http://localhost:3000/posts')
        .then((response) => response.json())
        .then((posts) => {
          const postsContainer = document.getElementById('posts');

          posts.forEach((post) => {
            const li = document.createElement('li');
            li.textContent = post.title;
            postsContainer.appendChild(li);
          });
        });
    </script>
  </body>
</html>
You can now imagine a more complex layout where you could call more endpoints to display full articles, lists of recommended posts, etc.
You might also be interested in these tutorials
Create full mock REST APIs in seconds using Mockoon's CRUD routes
Learn how to use Mockoon's CRUD routes to create a full mock REST API and manipulate resources with GET, POST, PUT, PATCH, and DELETE requests.
Read moreServe static files with a custom mock endpoint
Learn how to create an endpoint to serve static files (images, fonts, etc.) in your mock API server using Mockoon
Read moreUse global variables to save the state between requests
Use global variables to save the state between requests and simulate complex workflows and scenarios in your mock API.
Read more