Getting started with Mockoon Cloud
Learn how to get started with Mockoon Cloud, a cloud-based service that allows you collaborate on your mock APIs with your team
In this tutorial, we will learn how to get started with Mockoon Cloud, a cloud-based service that allows you to collaborate on your mock APIs with your team, deploy your mock APIs to the cloud, and generate HTTP endpoints with our AI assistant.
Prerequisites
Before starting this tutorial, make sure you signed up and subscribed to a Mockoon Cloud plan. If you haven't done it yet, you can sign up here. Our plans are available for individual developers and teams. You can also try Mockoon Cloud for free with our 7-day trial.
1. Install the desktop application or use the web app
After signing up for Mockoon Cloud, you will be able to access all the Cloud features in the desktop application. To fully benefit from your Mockoon Cloud plan, make sure you have the latest version of the desktop application installed.
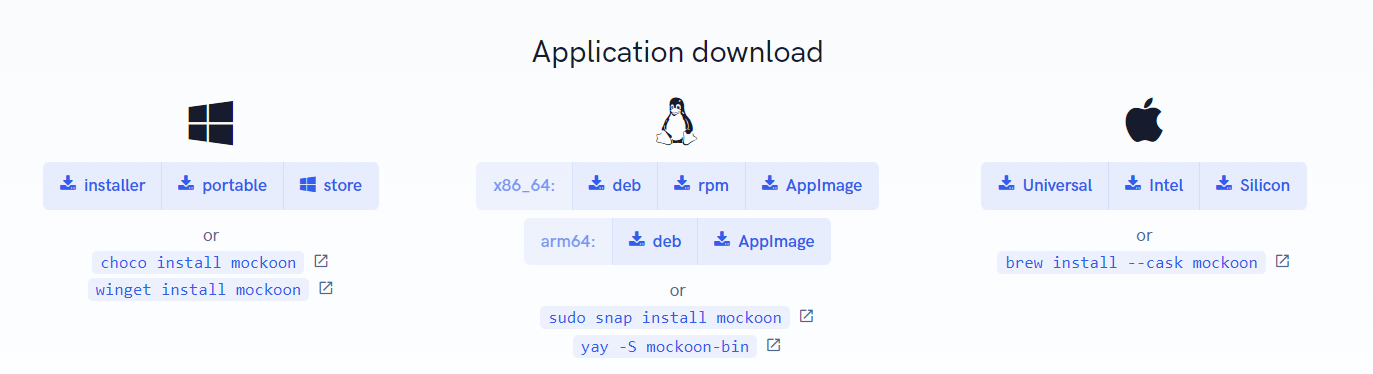
Head to the download page to get the latest version of the desktop application.
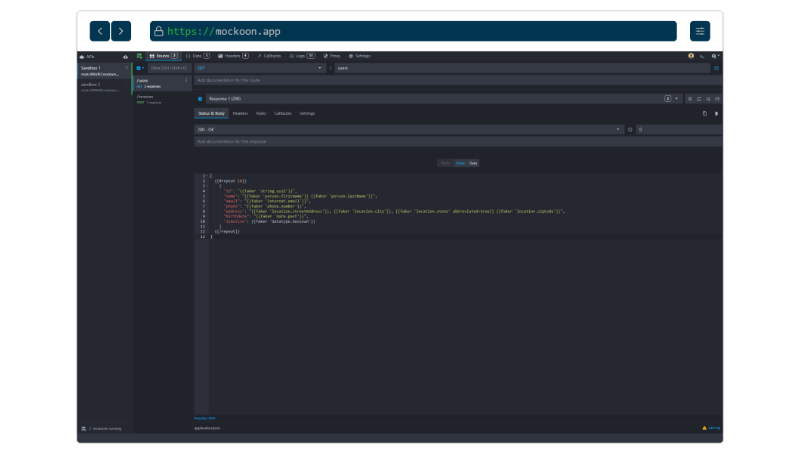
As an alternative, you can also use the Mockoon Cloud web app. This web application is designed for users who prefer a browser-based experience or cannot install the desktop application due to restrictions in their environment.
The web app is available to all users with a paid Mockoon Cloud plan. You can log in using your Mockoon account credentials. Once logged in, you will have access to your synchronized and deployed environments and can manage them directly from the web interface.
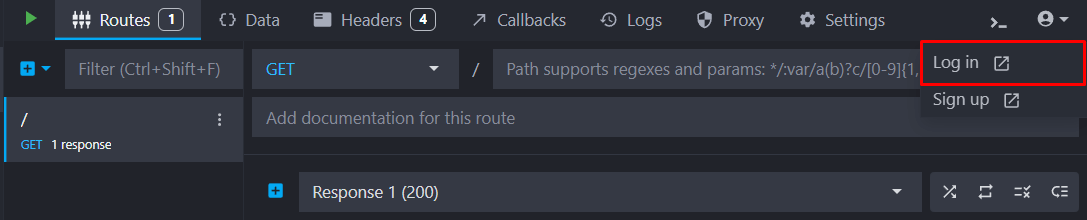
2. Log in to your account in the desktop application
To enable Mockoon Cloud features, you need to log in to your account in the desktop application using the user menu in the top right corner of the application.
If you are already logged in, you can also click on "Refresh account information" in the account menu.
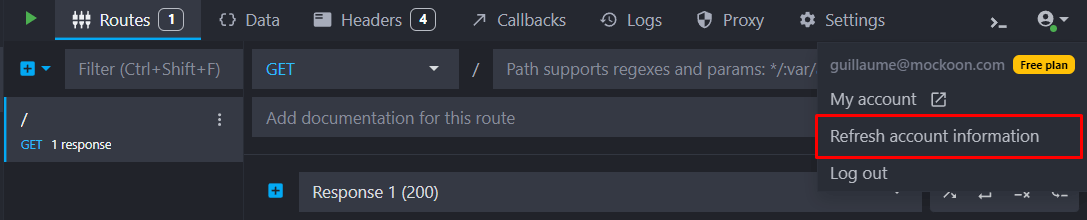
Once you are logged in, you should see your account information in the account menu.
3. Deploy your first mock API
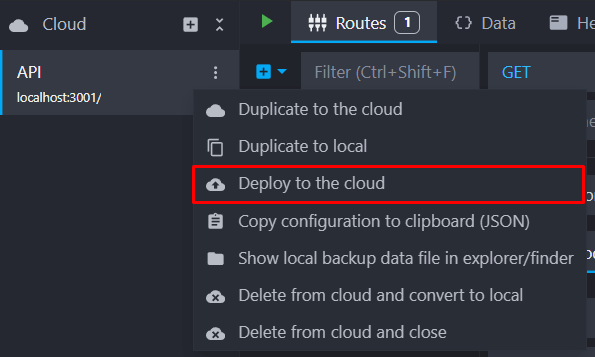
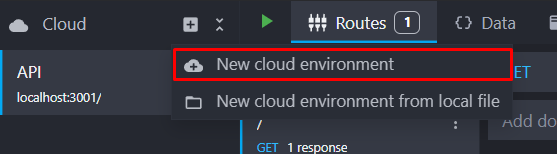
After creating your first mock APIs, you are now ready to deploy them to the cloud. You can indifferently deploy local or cloud environments to Mockoon Cloud.
To deploy an environment, click on the "Deploy to the cloud" menu entry in the environment menu.
You can then configure your instance and deploy your mock API by clicking on the "Deploy" button.
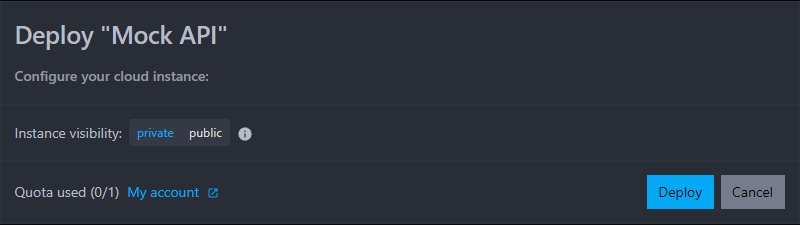
Currently, you can configure the instance visibility. More options will be available in the future.
The visibility of the environment can be set to public or private. Here are the differences between the two:
- Public: The environment is accessible to anyone with the URL.
- Private: The environment is accessible only to users with the URL and the API key. The API key is displayed in the management dialog and must be included in the request
Authorizationheader to access the environment.
Your mock API will be available in the cloud on a unique URL in the form of https://mock-abcd1234.{serverId}.mockoon.app. You can share it with your team and use it in your applications.
You can view and manage your deployments at any time by clicking on the "x instances deployed" button at the bottom of the application.
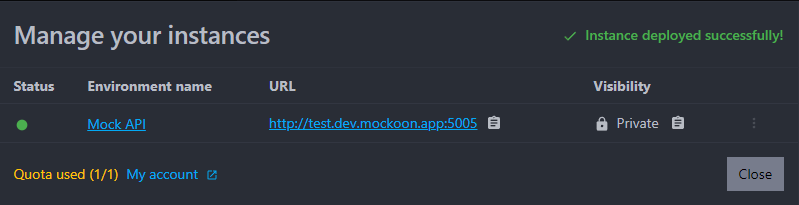
From the management dialog, you can re-deploy or delete the instance.
To learn more about cloud deployments, the supported features and limitations please read the documentation.
4. Synchronize your mocks or collaborate in real-time with your team
As soon as you are logged in, you will be able to create cloud mocks and synchronize them between your devices or collaborate in real time with your team.
Cloud environments are automatically synchronized with the cloud and between your devices as soon as they are created or updated.
You can always use local environments for your personal projects as they are not synchronized with the cloud.
Do not forget to invite your team members to collaborate on your mocks.
For more details on data synchronization and team collaboration features, head over to the dedicated documentation
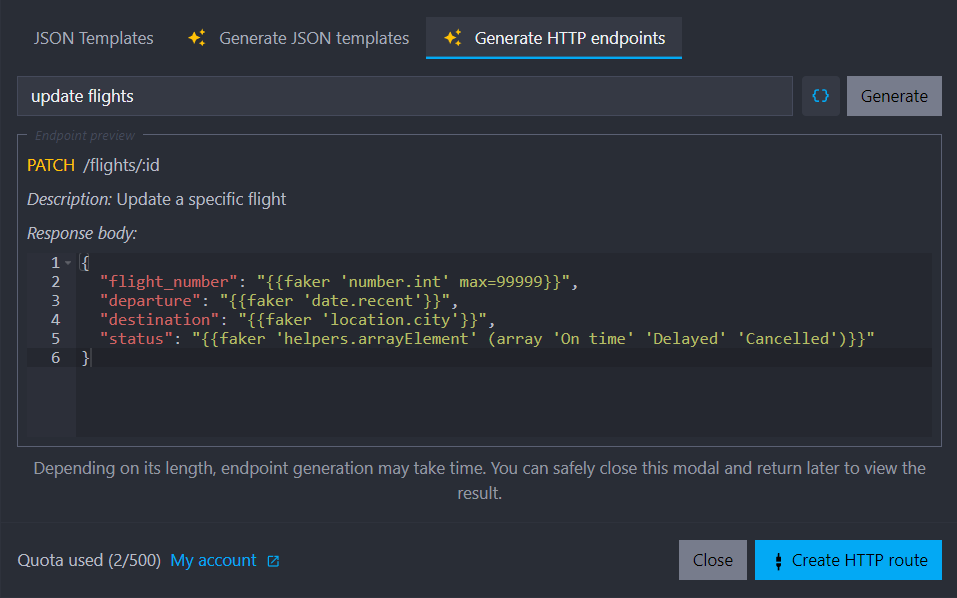
5. Generate HTTP endpoints with our AI assistant
Finally, you can generate JSON templates and HTTP endpoints using our AI assistants. They allow you to create realistic responses based on your prompt. It's perfect for quick prototyping and testing.
Our AI assistants are available in the "Add endpoint" menu.
You can read more about the AI assistants and JSON templates in our documentation
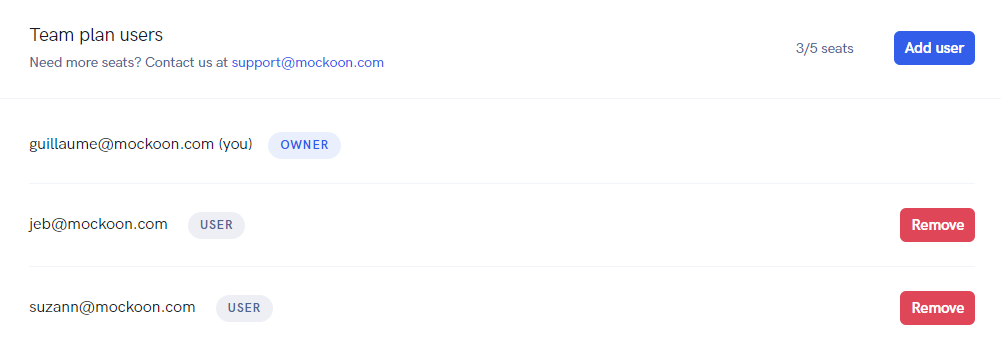
6. Invite team members to collaborate
If you are on a team or enterprise plan, you can invite your team members to collaborate on your mocks.
To invite team members, head to the users management page and click on the "Add user" button and fill in the email address of the user you want to invite.
You might also be interested in these tutorials
Use global variables to save the state between requests
Use global variables to save the state between requests and simulate complex workflows and scenarios in your mock API.
Read moreCreate a partial mock API with Mockoon's proxy mode
Learn how to create partial mocks of existing APIs with Mockoon's proxy mode in three easy steps
Read moreValidate your request payloads with JSON Schema
Learn how to validate your request payloads with JSON Schema in Mockoon to ensure your API clients send the correct data
Read more