
Create your first API with Flask (or mock it using Mockoon!)
Learn how to create your first REST API and endpoints with Python's Flask microframework or mock it using Mockoon to accelerate your application development
In this guide, you will learn how to create a basic REST API using Flask microframework for Python. Flask is one of the most popular and easy-to-use Python libraries for API creation.
Before continuing, you can learn more about REST APIs in general, how they work, their components, etc. in our series of tutorials
Creating an API using this library is easy, straightforward, and only requires the following basic steps.
1. Initialize your new Python application
To create a simple API using Flask, we first need to verify that Python and pip are installed by running the following commands:
Copy$ python --version
Python 3.10.4
Copy$ pip --version
pip 22.0.4 from /usr/lib/python3/dist-packages/pip (python 3.10)
Go to Python's website to install Python and pip if one of the above commands is unsuccessful.
After verifying that Python and pip are installed, you can install flask by running the following command:
Copy$ pip install flask
Collecting flask
...
Successfully installed Jinja2-3.1.1 MarkupSafe-2.1.1 Werkzeug-2.1.1 click-8.1.2 colorama-0.4.4 flask-2.1.1 itsdangerous-2.1.2
2. Create a Flask web server
Before coding our Flask server, we first need to create a new python file. Let's name it api.py and create it in a new folder of your choice.
In this file, we need to import the Flask class from the Flask library by using Python's import command:
Copyfrom flask import Flask
It will allow us to instantiate and run a web server instance.
We can now instantiate a new webserver instance by using the Flask class we previously imported, and pass the current module name:
Copyfrom flask import Flask

app = Flask(__name__);
3. Add API routes and return JSON data
We are now ready to add API routes to our webserver by using Flask's route() decorator with a path and a list of HTTP methods or verbs (GET, PUT, POST, etc.) as parameters:
Copyfrom flask import Flask

app = Flask(__name__);

@app.route('/users', methods=['GET'])
def get_users():
  return 'Get users'


@app.route('/users', methods=['DELETE'])
def delete_user():
  return 'Delete a user'
This code will enable calls to the /users API route for both the GET and DELETE methods.
To return JSON data, we will need to import jsonify, a function from Flask that can convert lists and dictionaries to JSON and send it in the response together with the correct Content-Type header (application/json):
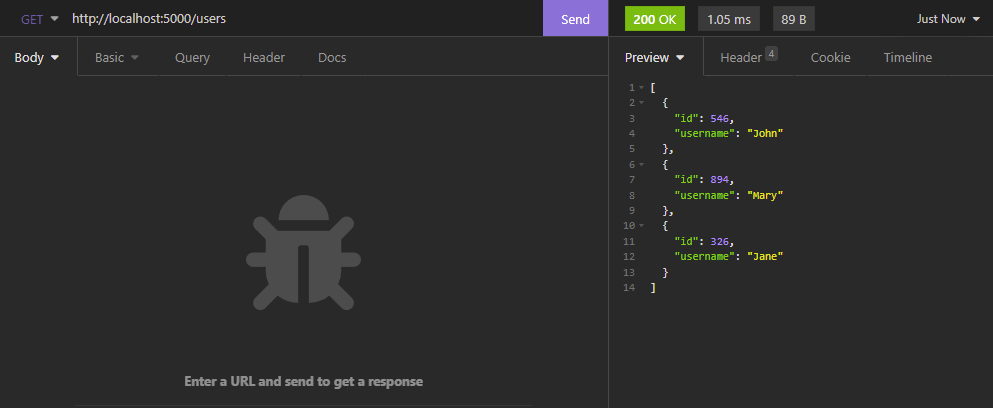
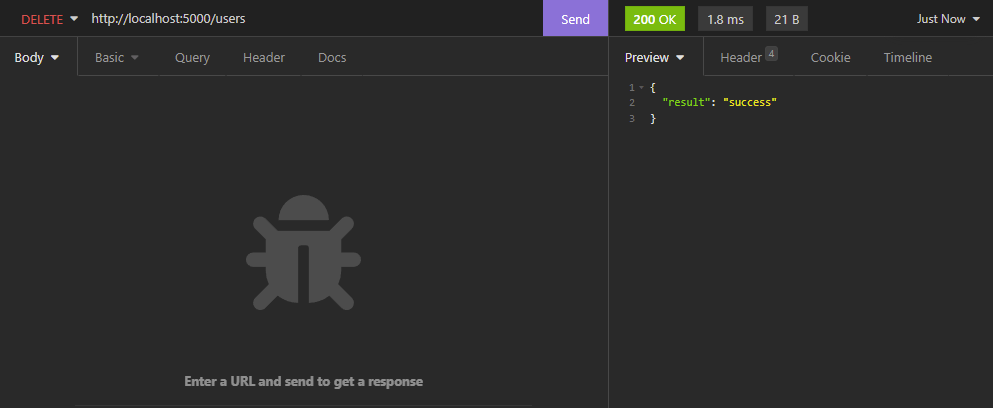
Copyfrom flask import Flask, jsonify

app = Flask(__name__);

@app.route('/users', methods=['GET'])
def get_users():
  return jsonify([
        {'id': 546, 'username': 'John'},
        {'id': 894, 'username': 'Mary'},
        {'id': 326, 'username': 'Jane'}
    ])


@app.route('/users', methods=['DELETE'])
def delete_user():
    return jsonify({'result': 'success'})
Of course, this code is quite basic, and the two routes we created should probably load the list of users and delete users from a database before returning a result. But this is out of the scope of this small tutorial.
4. Run your API web server
One last line of code is required for our code to run the webserver:
app.run()
Calling Flask instance run() function will run the webserver and listen on the default port 5000.
Here is the final code after putting everything together:
Copyfrom flask import Flask, jsonify

app = Flask(__name__);

@app.route('/users', methods=['GET'])
def get_users():
  return jsonify([
        {'id': 546, 'username': 'John'},
        {'id': 894, 'username': 'Mary'},
        {'id': 326, 'username': 'Jane'}
    ])


@app.route('/users', methods=['DELETE'])
def delete_user():
    return jsonify({'result': 'success'})

app.run()
You can now run your server with the following command:
python api.py
Your API is available on http://localhost:5000. You can do a test call to the following API endpoints GET /users and DELETE /users using your favorite tool (here, Insomnia) and see the returned response:
Speed up development with API mocking
Working with an API can be challenging. It could be unavailable for various reasons: the whole API is under development, some routes are missing, the documentation is outdated, the access is restricted to the production environment or behind a firewall, etc.
Instead of waiting for the API to be ready to be able to consume it, you could mock it using an API mocking tool like Mockoon.
API mocking is a technique that consists in imitating an unavailable API by simulating the endpoints and their responses. With this technique, you can have a running mock in no time and start calling it right away from your front-end or back-end application.
Mocking an API with Mockoon is easy and requires only some small steps to start working.
To learn more about setting up Mockoon and creating your first fake API in less than 5 minutes, head over to our getting start tutorial
 API mocking with Mockoon
You might also be interested in these tutorials
Serve static files with a custom mock endpoint
Learn how to create an endpoint to serve static files (images, fonts, etc.) in your mock API server using Mockoon
Read moreSimulate webhooks and callbacks in your mock API server
Learn how to simulate webhooks or callbacks in your mock API server to test your application's behavior when receiving asynchronous events from third-party services or APIs.
Read moreAdvanced data bucket manipulation with setData
Learn how to build stateful mock APIs with Mockoon's setData helper using advanced API key rotation, usage tracking, login, and lockout scenarios.
Read more